Administration
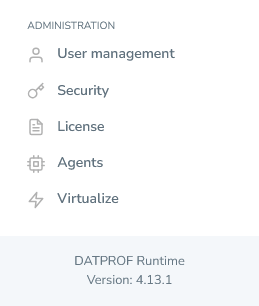
At the bottom of the menu on the left side of the screen, you'll find a section titled Administration.
This section contains five options:
User Management
Security
License
Agents
Virtualize (This option may be disabled depending on your license type)

User Management
The user management screen allows administrators and users with the proper permissions to govern all users, user groups, roles & permissions. On top of this, LDAP functionality is contained within this menu. Because the user permission system is quite complex, we’ve dedicated an entire chapter of the documentation under this one to it. Therefore, please refer to the Configuring Runtime Permissions sub-chapter to learn how our user permission system is designed. Likewise, for LDAP we’ve included a separate sub-chapter as well titled LDAP Configuration.
Upon a fresh installation of Runtime without an existing DATA folder, Runtime automatically creates an administrator account to allow the installer to access the interface. This is a user who is assigned the standard role of Administrator. Functionally, this means that this account is able to configure all aspects of Runtime, and allows the user to modify the existing rights from the start. Changes to this account can be made, but care should be taken that it is not deleted, unless other users exist who function as a de facto administrator account. Not taking care to do this can lead to a permissions configuration where the user locks himself out of certain system functionality.
The administrator account is initially set up with the following default login credentials:
Username: admin
Password: admin
For enhanced security, it is strongly recommended to update the default password to a more secure one immediately after installation.
Security
The Security Overview allows you to manage API tokens and security keys. You can view existing API tokens, and add or remove security keys from this screen to improve the security of DATPROF Runtime.
API Tokens
In order to send API calls a valid API token is required. Currently, API tokens are always tied to a user, and all rights assigned to the user are matched when interacting with the Runtime API. This means that when an API token is created care must be taken to ensure that the user under which the token is registered has the correct rights, otherwise when executing any API calls a 401 – Unauthorized response will be automatically generated.
There are two views which include information about API tokens, one tied to the user's profile, and a universal API token administration screen.
User-specific API Token menu
Since API tokens are tied to individual user accounts, each user can create and manage their own API tokens, provided they have the Manage User API tokens permission assigned to them. To access and create a personal API token, follow these steps:
Access User Profile:
Click on the user profile icon in the top-right corner of the Runtime interface.Navigate to API tokens:
From the dropdown, select API tokens. This will open a new view displaying an overview of all the API tokens registered under the user's account.Generate New API Token:
In the top-right corner of the API tokens view, press Generate API Token.Specify Token Details:
In the dialog that opens, enter a name for the new token and click Save Changes. Don't forget to copy your token!
This process allows users to create API tokens for various use cases, such as automating tasks, integrating with other tools, or accessing specific resources within their environment.
Don't forget to copy your token!
Once an API token has been saved, it's no longer possible to see what the actual token is. Therefore, the user only has one opportunity to copy the token and store it somewhere secure.
You should now see your created in the API tokens overview under your user-profile.
Demo: creating an API token
API token permissions
API tokens are generated by users and are tied directly to their accounts. This setup has important security and management implications:
Permissions Inheritance:
Each API token inherits the permissions of the user to which it is attached. This means that to edit the permissions of an API token, the user’s permissions must be modified. This ensures that API tokens follow the same access control as their associated user accounts.Granular Control and Security:
By attaching API tokens to specific users, administrators can assign different rights to different tokens (users), enhancing security. For example, separate tokens could be issued for different groups, environments, or templates, and this makes it easier to track and manage which token was used to execute a script. This also helps prevent malicious usage, as the tokens are tightly controlled and can be traced back to a specific user.Deletion of API tokens:
If a user is deleted from the system, all API tokens associated with that user are automatically removed. This ensures that no orphaned tokens remain active, which could pose a security risk.
Universal API Token menu
The Universal API Tokens menu is located on the left-hand side of the Runtime main page menu. It provides an overview of all existing API tokens and allows users to revoke tokens as needed. To revoke a token, simply press the Revoke button located on the left side of any given token entry.
However, it's important to note that this menu is not suitable for creating new tokens. To create or manage new API tokens, users must access the User-specific API Token menu.
In order to access this view, the user trying to access it must navigate to the User-specific API Token menu and have the Manage API tokens permission assigned to them.
Adding the API token into scripts
To authenticate API tokens, the system checks if the token is included in the header of an API call. Users can include their API token in the request header using the following syntax: --header "X-auth-token:<TOKEN>"
In this syntax, replace <TOKEN> with the actual API token that was generated for your user account. This header is sent along with the API request to verify the identity of the caller and ensure proper authorization for accessing the requested resources.
Security Keys
Security keys are used to verify the integrity and authenticity of uploaded packages as part of the Application Verification process. These keys ensure that the package contents have not been altered and originate from a trusted source.
To use a security key, you must retrieve it from Privacy or Subset, and enter it in Runtime. This verification step enhances security by preventing unauthorized modifications and ensuring that only approved packages are executed. Depending on your configuration, missing or incorrect keys may result in verification failures or restricted functionality.
A how-to to enable application verification is explained here.
License

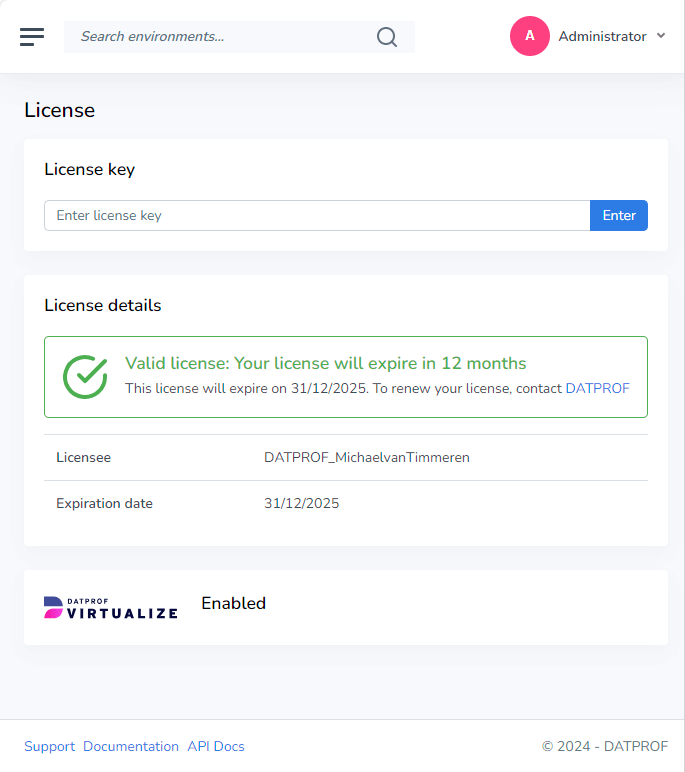
The license is entered after installation. Without a license, Runtime can start but you can't add or configure groups/environments.
In the License Management screen, you can check and update the license if it is about to expire. The license status is clearly displayed, and you will see one of the following statuses:
Valid:
The license is active and does not require immediate action. Everything works as expected.
Almost Expired:
A yellow notification bar appears at the top of the application starting 30 days before the license expires, alerting you that the license will expire soon. You can hide this notification bar if desired.
Expired:
After the license expires, a red notification bar appears at the top of the application, indicating that the license has expired. Once expired, you will no longer be able to upload, install, or uninstall applications, but you can still run existing applications. The notification bar cannot be hidden.
If your license is nearing expiration, it is advisable to renew it promptly to avoid any interruptions in service or functionality.
Agents
Agents reworked in 4.4:
How we handle agents has been fundamentally changed in Runtime 4.4! If you're still using older versions of DATPROF Runtime, please navigate to an older version of this documentation in the top right corner of the website.
Agents are vital for Runtime. Every agent is a Java process that is started by Runtime to execute database tasks. Therefore an agent is both required to install an application (in the database) and to run the application. You can have multiple agents active at any given time.
Agents belong to DATPROF Runtime and will be used by different applications. In other words, applications share Agents.
Note:
An application requires only one available agent. The parallel setting you enter on things like Privacy or Subset templates has nothing to do with the number of agents but applies to the threads within an agent.
Agents are automatically created when a run is started, and dropped when a run is completed.
This will immediately create an entry on the screen and an entry in the Runtime Meta Data Service database.
Every agent has three attributes, ID, Status
ID: This is a unique number identifying the agent.
Status of the Agent
UNAVAILABLE: The Agent is created but not running.
AVAILABLE: The Agent is started and a java process is waiting to execute a task.
RUNNING: The Agent is executing a task.
PAUSED: The Agent is paused on user request by pausing the application.
The Agents use the UUID as their name. On the filesystem in the Runtime Data folder you have an agents folder. In this agents folder a subfolder is created for every agent using the UUID as its name. In this folder you’ll find both the code to run and the agent's logfiles.
Managing agents can be done with the buttons at the right side, the action depends on the current status.
Status | Actions |
|---|---|
UNAVAILABLE | Start and Delete |
AVAILABLE | Stop and Delete |
PAUSED | - |
RUNNING | Stop |
Deleting a Paused or Running agent is not possible.
Note: An application in Error will keep an agent in a Running state.
