Virtualize’s core principles revolve around performing tasks within a virtual machine. Because there are a couple of technologies which we’re reliant on within this virtual machine, DATPROF distributes a VM image as a part of the software package. While creating and using your own virtual machine is technically possible, we don’t recommend or support this due to the inherent complexity of networking and software dependencies.
About the VM
The virtual machine image we supply is a .ova file. This is a file format for VM images that is natively supported by multiple different tools, and as such VMWare vSphere is only one of the possible tools you can use to deploy this. The information on this page can be roughly applied to other VM hosting solutions.
Importing the VM
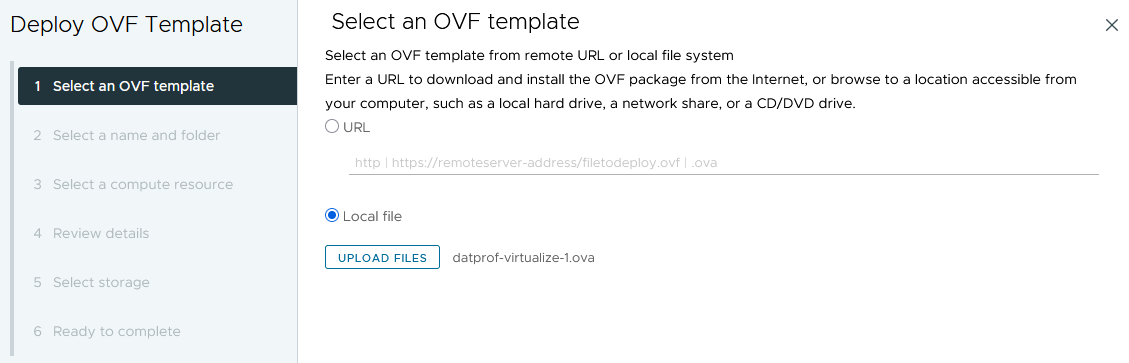
In VMWare, select Deploy OVF template. This will allow you to go through the following required steps in order to deploy the Virtualize virtual machine:
-
Select an OVF template
-
Here, you can select the virtualize OVA file as supplied by DATPROF.
-
-
Select a name and folder
-
Select a compute resource
-
Review details
-
Select storage
-
Ready to complete
The settings you choose during the deployment in VMWare rely on some existing configurations, such as the availability of a storage pool on the VMWare instance. In terms of overal specifications and requirements, the following is a good rule of thumb:
The VM will be used to host Docker and the BTRFS filesystem, which in turn hosts database machines and facilitates snapshotting and cloning. When configuring compute and RAM allocations, try to emulate the specifications of a database server you’re used to working with on the chosen data. If you’re bundling multiple (large) databases into the same VM, this means the specifications of the VM might have to be quite significant, depending on the intensity of usage. Luckily, this is something which you can raise or lower at a later point as well.
Starting the VM
Once the above steps have been completed, you can select the VM image in the main menu of Oracle VirtualBox Manager, and press Start. The VM will now launch a new dialog screen, in which various settings will be set as part of a first time setup.
Once this is done, you’ll be granted with the following console line:
Format: < VM_name > login: Password: Example: datprof-virtualize-1 login:
Password:
Here, you can simply input datprof , followed by a password, which is also datprof. As soon as this is done, you’ll be able to execute commands on the VM on the shell.
The password shown here is temporary! This will be modified upon connecting to the VM through the Runtime interface for the first time.
IP Configuration
In terms of IP configuration there are two options. It’s possible to use a fixed IP, but it’s also possible to configure DHCP on the Virtual Machine so that IP allocation is done automatically. The easiest of these two options is using DHCP, as it takes away the need for the user to know which fixed IP to use.
Both of these can be configured with scripts, as detailed below. Directly altering the netplan is also possible, by modifying /etc/netplan/00-installer-config.yaml.
Using DHCP
To configure DHCP on the VM, we can execute the setup-dhcp-ip script on the virtual machine. To do this, simply input the following command:
sudo setup-dhcp-ip
After this, the user is prompted to confirm this action. Once this action has completed, apply the new netplan, and restart the VM.
netplan apply

reboot
On the next start-up, you should see a new IP be automatically assigned to the VM.
Because DHCP dynamically assigns IPs, it’s possible that the IP of your VM changes on reboot. The setup-dhcp-ip script does attempt to create a dhcp configuration which assigns semi-consistent IPs to machines based on their MAC-address to somewhat mitigate this.
Using a fixed IP
To configure a static IP on the machine, we can execute the setup-fixed-ip script on the virtual machine. To do this, simply input the following command:
sudo setup-fixed-ip
After this, you’ll need to supply the following values:
    - Hostname: datprof-vm
    - IP: 192.168.56.99/24
    - Gateway: 192.168.56.1
    - DNS: empty, press enter to pass.
You’ll now see the script set a number of environment settings. Once this is done, the user is prompted to restart the VM. You can do this after applying the netplan by executing the following commands:
netplan apply

reboot
Editing Host Directory
In order to give our VM a DNS name that we can use to connect, we need to edit the windows host file with a basic text editor. The hosts file is usually located in the following location:
C:\Windows\System32\drivers\etc\hosts
Here, simply add the following line:
Example:
192.168.56.99 datprof-vm
First Time Setup in Runtime
In runtime, open the Virtualize menu, and press Connect Container Host in the top-right corner. Then, you should see the following:
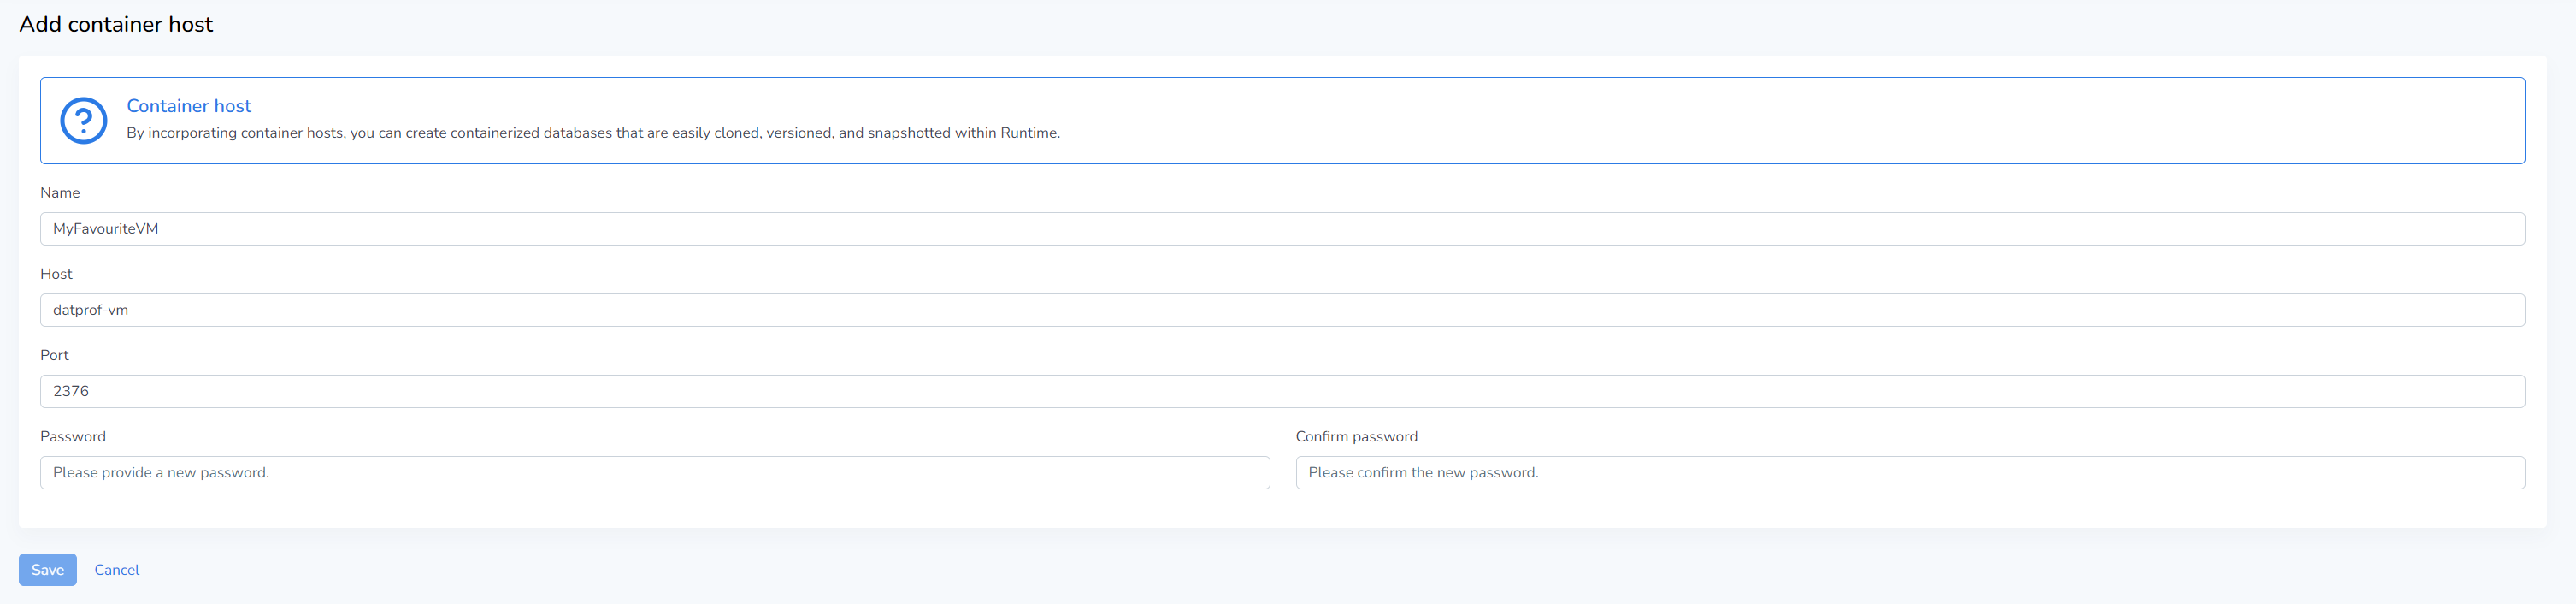
Here, supply the following:
-
Name: any name you prefer for the VM.
-
Host: datprof-vm
-
Port: 2376
-
Password: any password that is:
-
8 characters long,
-
contains at least one uppercase letter,
-
and contains at least one special character.
-
Once this is done, press Save. If all the previous steps were correctly followed, you should see the following first-time setup being done:
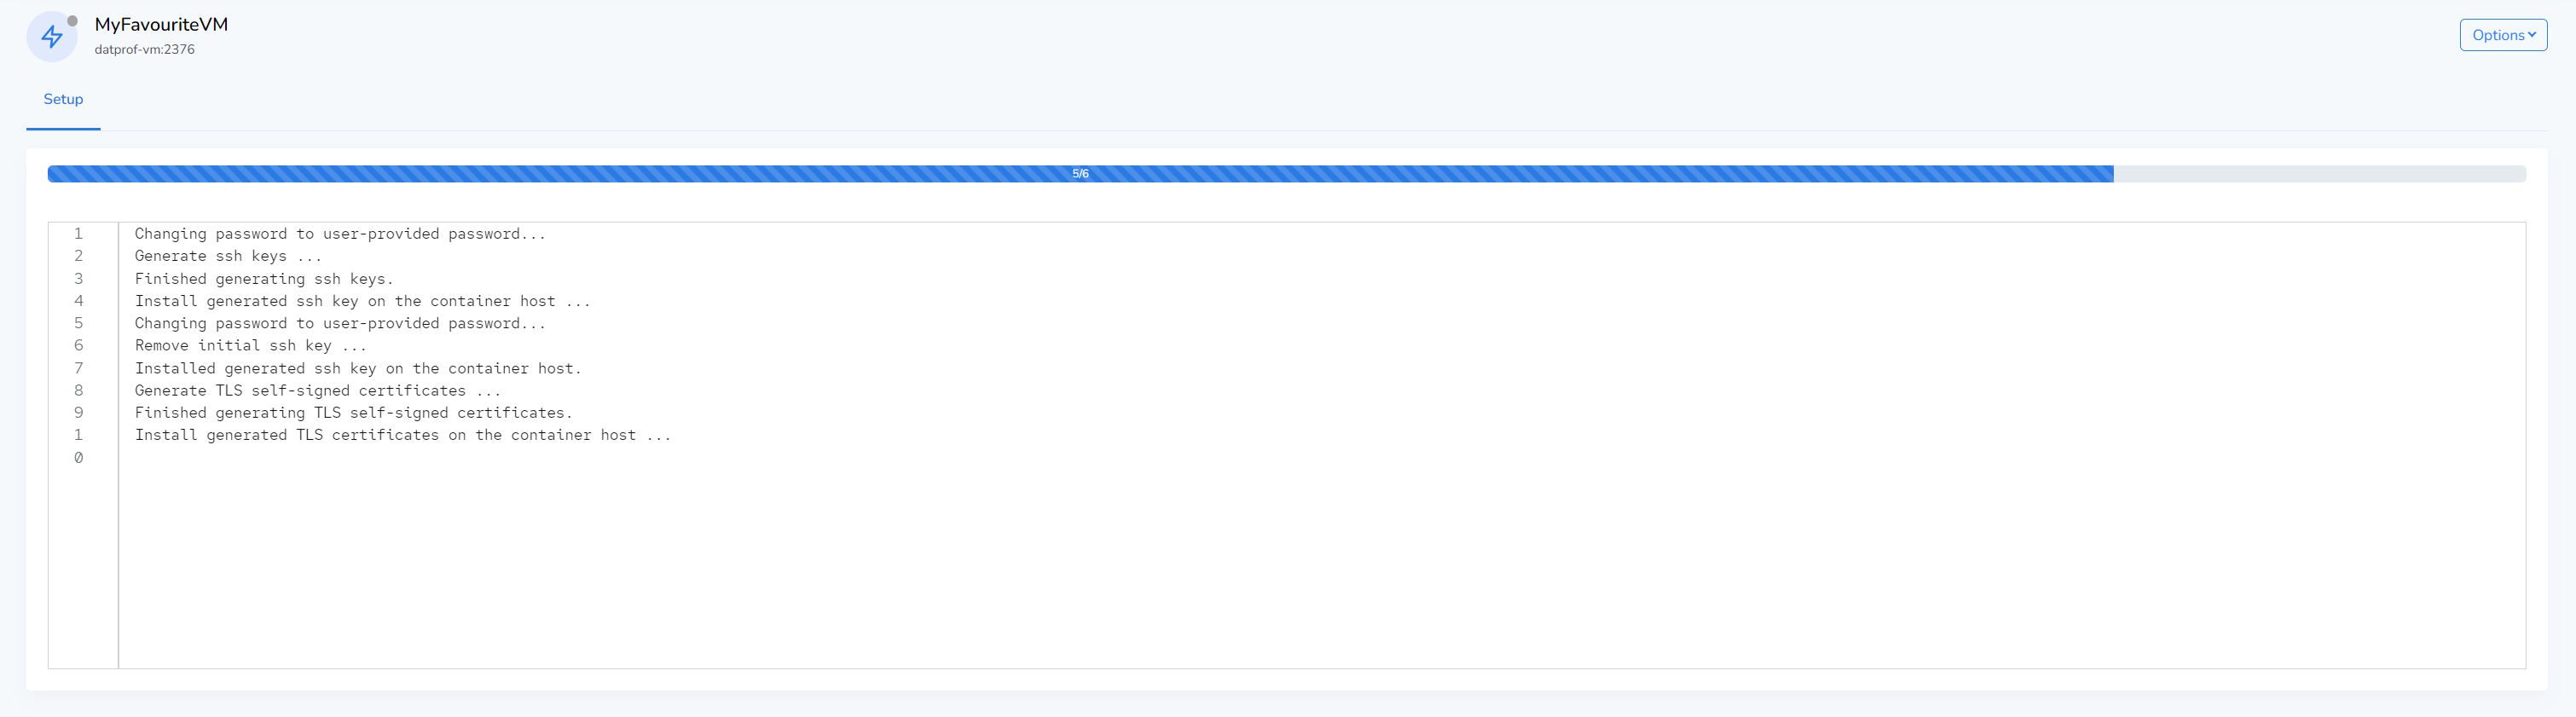
From this point onward, you should be able to connect to the Virtualize VM, and use Virtualize functionality.