Virtualize’s core principles revolve around performing tasks within a virtual machine. Because there are a couple of technologies which we’re reliant on within this virtual machine, DATPROF distributes a VM image as a part of the software package. While creating and using your own virtual machine is technically possible, we don’t recommend or support this due to the inherent complexity of networking and software dependencies.
About the VM
The virtual machine image we supply is a .ova file. This is a file format for VM images that is natively supported by multiple different tools, and as such Oracle VirtualBox is only one of the possible tools you can use to deploy this.
Importing the image
Once you’ve obtained the VM image, open Oracle VirtualBox Manager. Then, follow these steps:
-
In the top-right corner, press File → Import Appliance…
-
In the subsequent menu, input the path to your .ova file under the File.. field.
You should now see the following configuration screen for the virtual machine image:
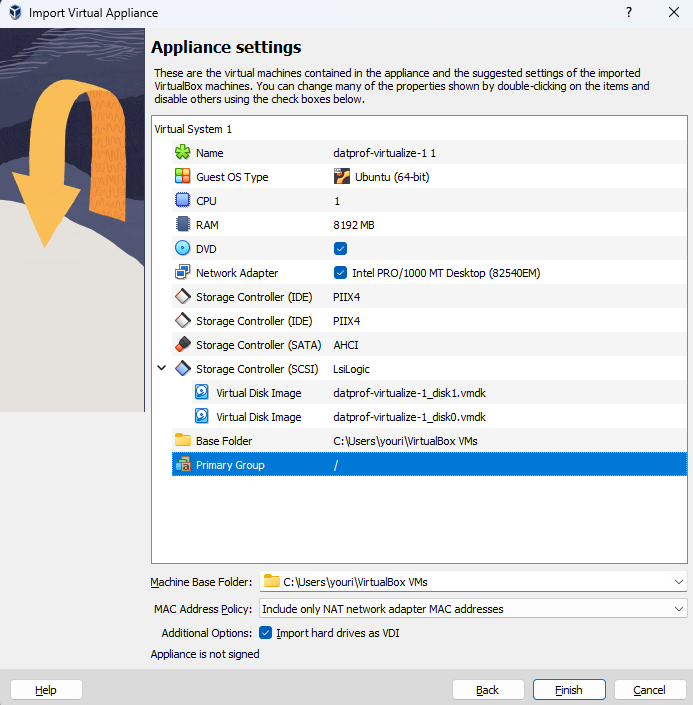
Virtual Appliance Settings
In general, common sense should be used when configuring the above, depending on how much load you assume your application will endure. For an initial setup we recommend two CPU cores, and a minimum RAM of 4GB. It’s important to confirm that Import hard drives as VDI is ticked under the Additional Options menu, as this enables us to resize them later.
These image parameters can be adjusted later during actual usage, so don’t worry too much about estimating actual CPU/RAM usage up-front!
Another thing we need to configure is the size of our virtual disks. To do this, press File → Tools.. → Virtual Media Manager. Here, you’ll see all your currently configured virtual disks.
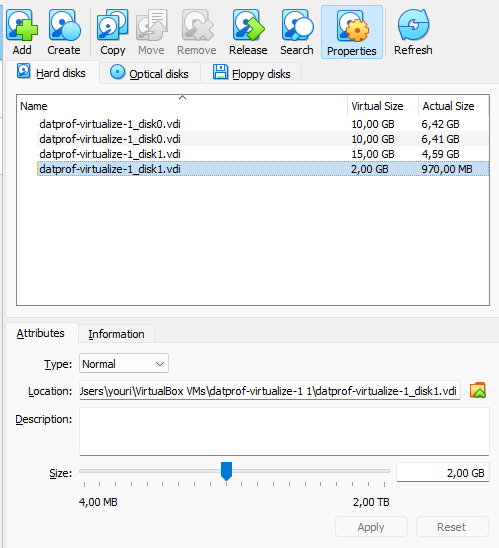
Here, datprof-virtualize-1_disk1.vdi is the disk that actually contains our BTRFS filesystem, and is the disk where our database data will be stored. You can adjust this as needed to fit enough space for your databases. For an initial setup, we recommend setting this to 15GB by using the Size slider, and pressing Apply.
As your database grows, you’ll need to increase this disk size!
Additional Required Settings
Once a VM has been imported, select the VM in the main menu, and press Settings → System. Here, tick the “Enable EFI (special OSes only)“ option.
Networking
In terms of networking, there are many options available. For this documentation we are only going to look at the Host-Only Adapter for workloads where only the host needs to access the VM, and the Bridged Adapter for workloads where other machines on the local network need to access the VM.
Host-Only Adapter
A host-only adapter is made to facilitate communication between the local host and the virtual machine, and does not facilitate communication between any other machines on the local network and the VM.
To configure this press File → Tools.. → Network Manager in the main menu. In the subsequent networking menu, press Create to create a new Host-Only Ethernet Adapter.
Copy the following configuration:
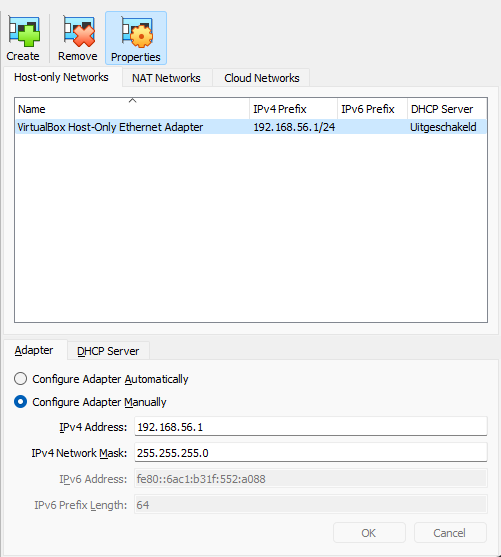
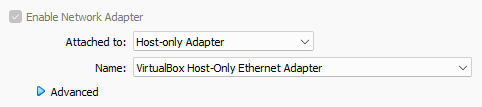
After this, press Settings → Network. Here, change the adapter to a Host-only Adapter, and select the newly configured adapter from the drop-down box under the Name field.
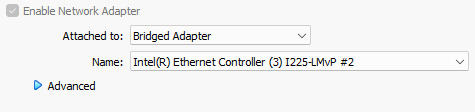
Bridged adapter
A bridged adapter allows you to virtually publish the IP of the virtual machine as a local IP on the host machine. This allows traffic from other machines on the same network to access the VM, and the container images.
To configure this press Settings → Network. Here, change the adapter to a Bridged Adapter. In order to use the bridged adapter, we need to specify which network adapter on the host we want to connect to. This can be any ethernet connection which you typically use to connect to the network.
Starting the VM
Once the above steps have been completed, you can select the VM image in the main menu of Oracle VirtualBox Manager, and press Start. The VM will now launch a new dialog screen, in which various settings will be set as part of a first time setup.
Once this is done, you’ll be granted with the following console line:
Format:
< VM_name > login:
Password:

Example:
datprof-virtualize-1 login:
Password:
Here, you can simply input datprof , followed by a password, which is also datprof. As soon as this is done, you’ll be greeted by the following:
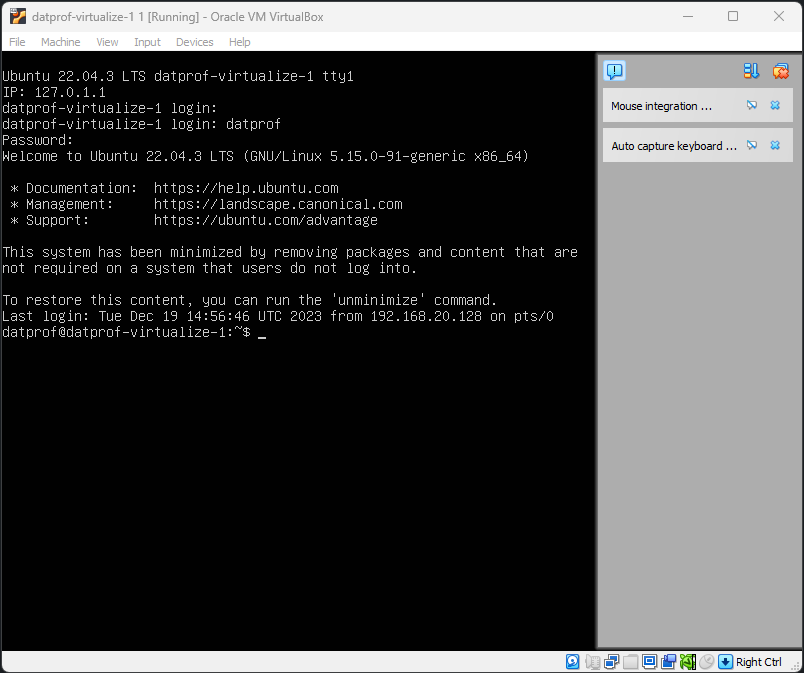
From this point onwards, the VM is up and running. To make connecting to the VM more straightforward, we recommend editing the Windows host file to supply a DNS name for our locally hosted VM.
IP Configuration
In terms of IP configuration there are two options. It’s possible to use a fixed IP, but it’s also possible to configure DHCP on the Virtual Machine so that IP allocation is done automatically. The easiest of these two options is using DHCP, as it takes away the need for the user to know which fixed IP to use.
Both of these can be configured with scripts, as detailed below. Directly altering the netplan is also possible, by modifying /etc/netplan/00-installer-config.yaml.
Using DHCP
To configure DHCP on the VM, we can execute the setup-dhcp-ip script on the virtual machine. To do this, simply input the following command:
sudo setup-dhcp-ip
After this, the user is prompted to confirm this action. Once this action has completed, apply the new netplan, and restart the VM.
netplan apply

reboot
On the next start-up, you should see a new IP be automatically assigned to the VM.
Because DHCP dynamically assigns IPs, it’s possible that the IP of your VM changes on reboot. The setup-dhcp-ip script does attempt to create a dhcp configuration which assigns semi-consistent IPs to machines based on their MAC-address to somewhat mitigate this.
Using a fixed IP
To configure a static IP on the machine, we can execute the setup-fixed-ip script on the virtual machine. To do this, simply input the following command:
sudo setup-fixed-ip
After this, you’ll need to supply the following values:
    - Hostname: datprof-vm
    - IP: 192.168.56.99/24
    - Gateway: 192.168.56.1
    - DNS: empty, press enter to pass.
You’ll now see the script set a number of environment settings. Once this is done, the user is prompted to restart the VM. You can do this after applying the netplan by executing the following commands:
netplan apply

reboot
Editing Host Directory
In order to give our VM a DNS name that we can use to connect, we need to edit the windows host file with a basic text editor. The hosts file is usually located in the following location:
C:\Windows\System32\drivers\etc\hosts
Here, simply add the following line:
Example:
192.168.56.99 datprof-vm
First Time Setup in Runtime
In runtime, open the Virtualize menu, and press Connect Container Host in the top-right corner. Then, you should see the following:
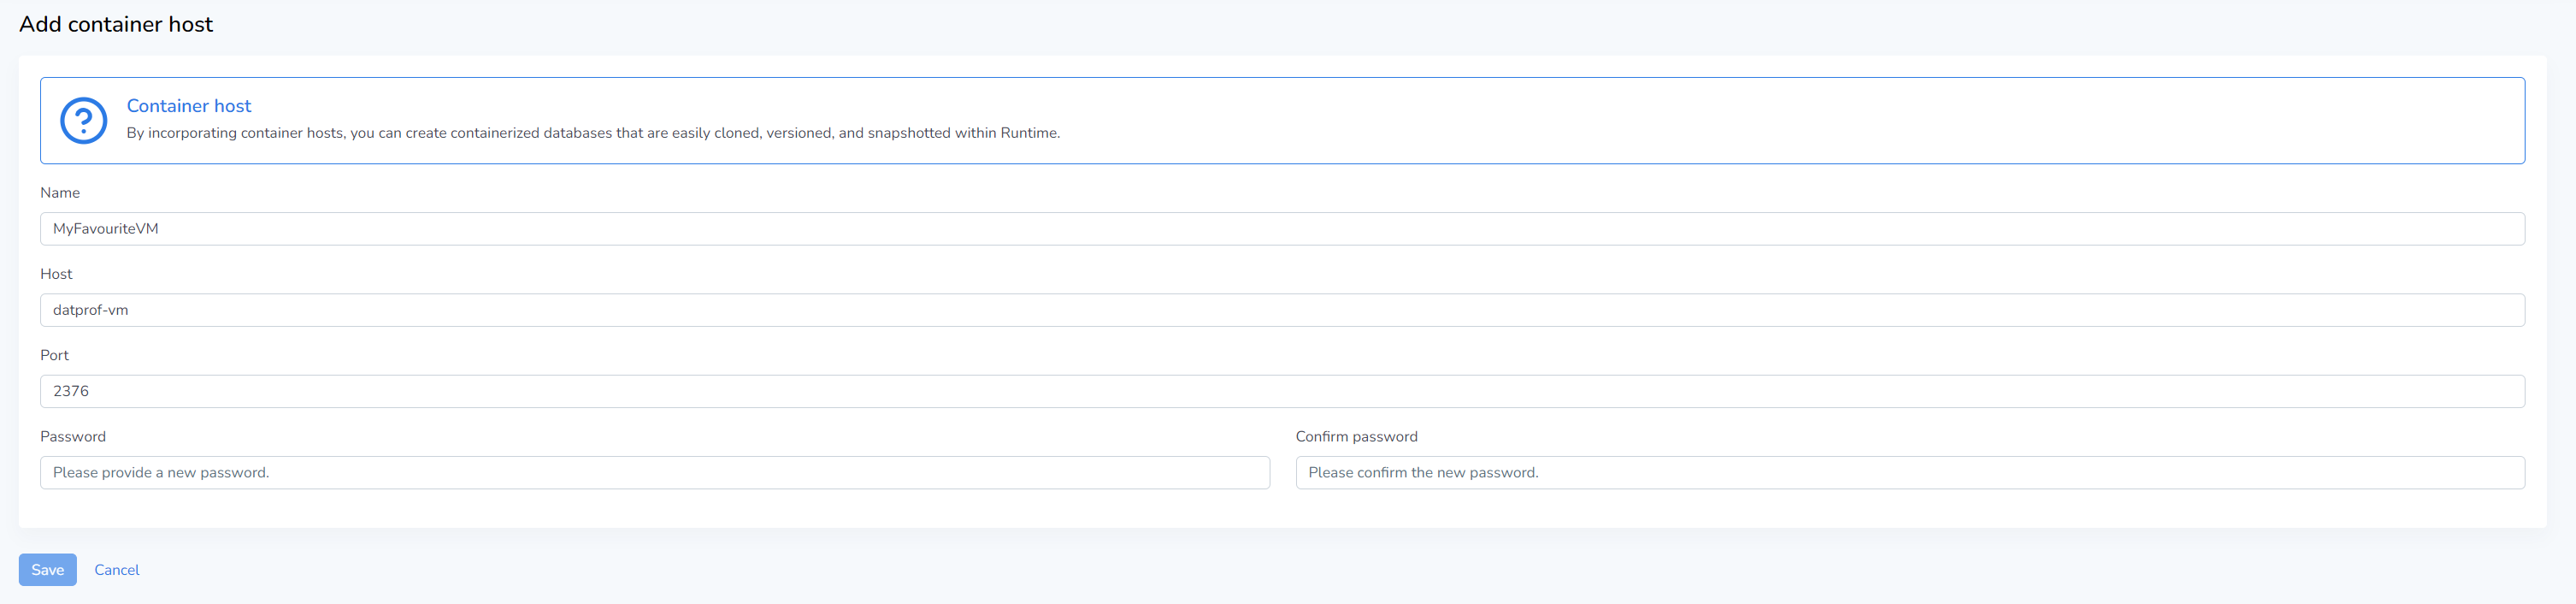
Here, supply the following:
-
Name: any name you prefer for the VM.
-
Host: datprof-vm
-
Port: 2376
-
Password: any password that is:
-
8 characters long,
-
contains at least one uppercase letter,
-
and contains at least one special character.
-
Once this is done, press Save. If all the previous steps were correctly followed, you should see the following first-time setup being done:
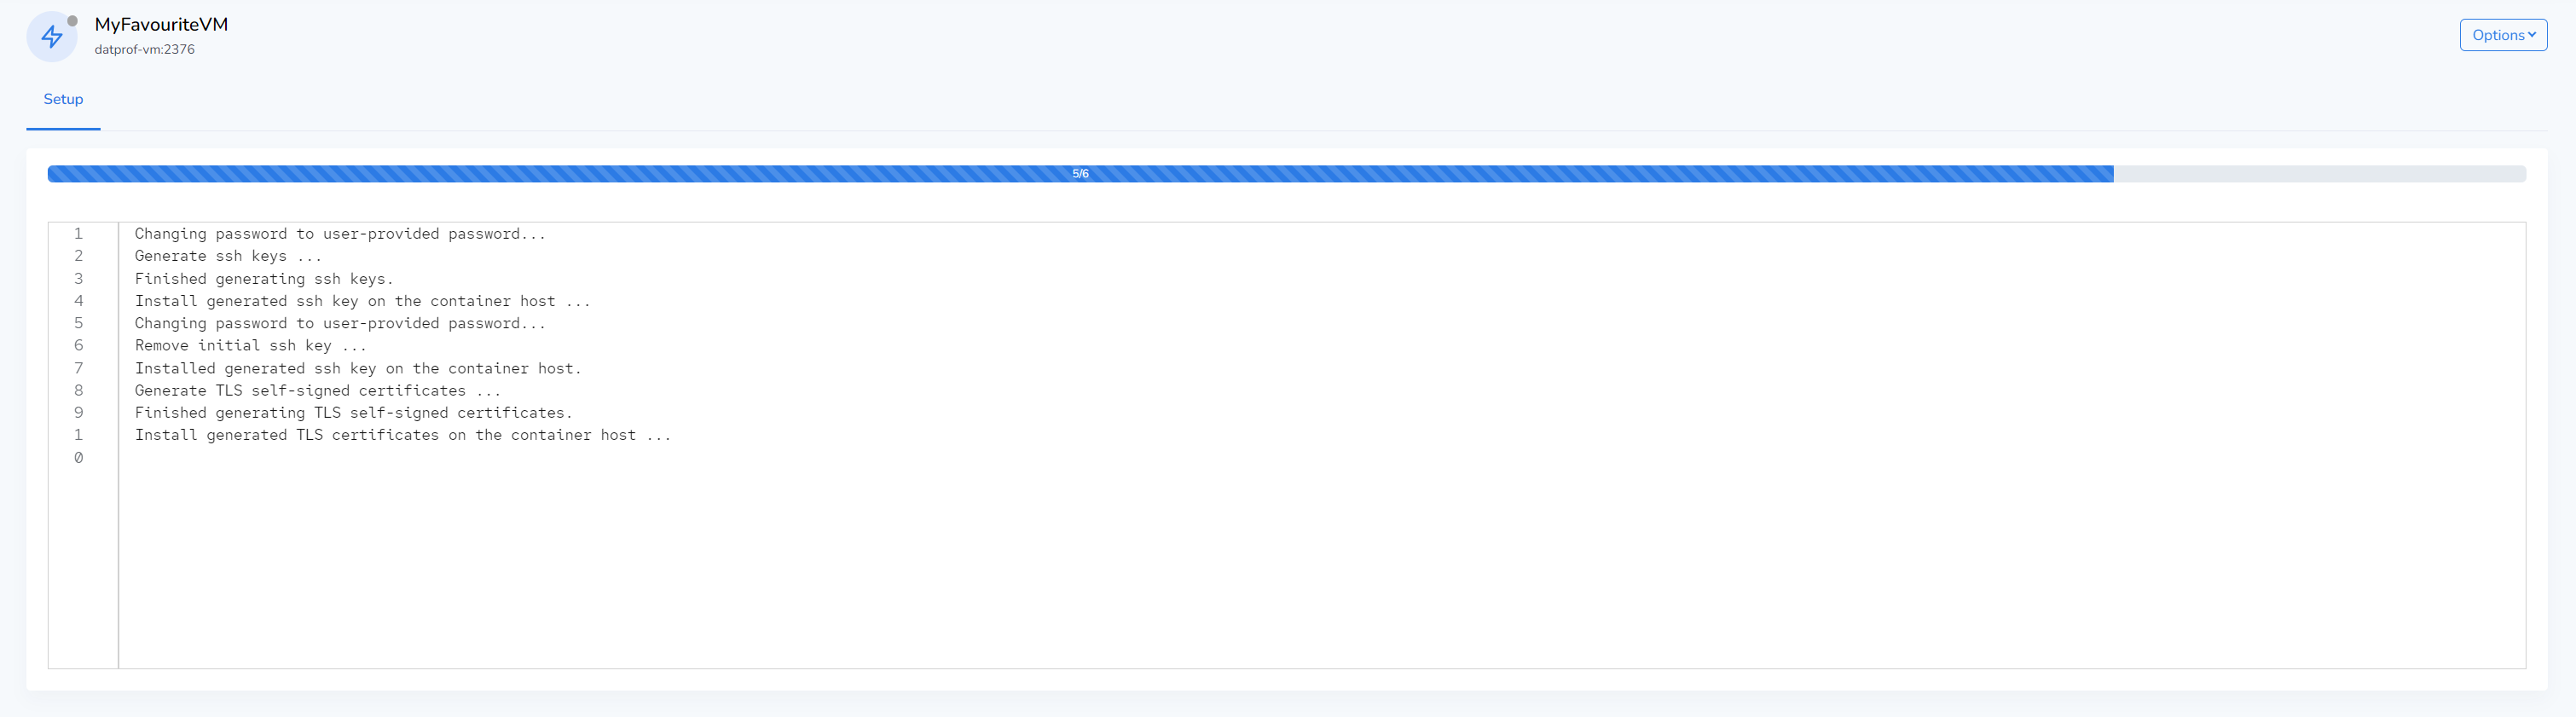
From this point onwards, you should be able to connect to the Virtualize VM, and use Virtualize functionality.