Development Tools
DATPROF Subset offers several classification tools to simplify working with complex data models. These tools help users organize, manage, and fine-tune the structure of their data subsets.
Filtering
To streamline navigation and focus on specific tables, you can reduce the number of tables displayed by applying a search filter. This feature is particularly useful when working with complex data models containing numerous tables.

If you know the exact name of a table, you can type it directly to narrow the results. For broader searches, use the '%' symbol as a wildcard. For example, entering Customer% will show all tables starting with "Customer," while %Order% will display tables containing "Order" anywhere in their names. It's important to note that this filter only affects the display of tables in the panel and has no impact on the subsetting process.
S% will select all tables that begin with the letter S.
%S will select all tables that end with the letter S.
%S% will select all tables that contain an S anywhere inside it, but not at the start or end (unless it has one in the middle of the word, too!)
Labels
Adding labels to tables simplifies creating functional selections of tables. Labels can be managed from the Label menu, located to the right of the search panel.
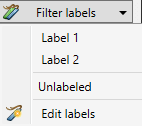
Filter by Label: Select one or more labels to display only the tables associated with them.
Unlabeled: Show tables that haven't been assigned a label.
Edit labels: Add or remove labels as needed.
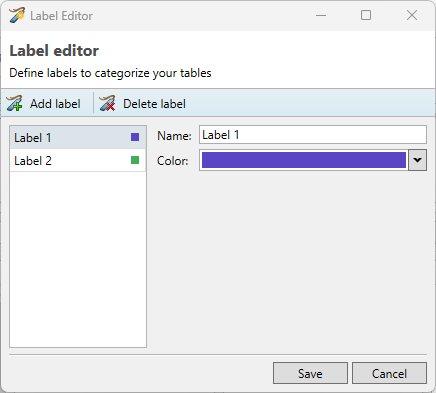
Starting from Subset version 4.12.0, it is possible to rename labels. In any version prior to 4.12, this feature is unavailable, and labels can only be deleted.
Labels can be assigned to tables to help organize and categorize them within the development process. These labels serve as identifiers or tags for easier reference and management of tables during the subset creation, but they do not affect the actual subsetting process itself.
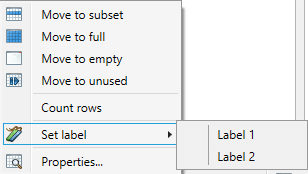
Labels can be assigned to tables by clicking the right mouse button and selecting one or more labels. This can also be done by selecting multiple tables and assigning labels to them.
Count Rows
The number of rows in tables within the Source database can be counted. This feature is particularly helpful during the classification of tables, such as determining the most suitable Start table. To count rows, right-click the desired table(s) and select Count Rows from the menu. The results of the row count are then saved to the project file.
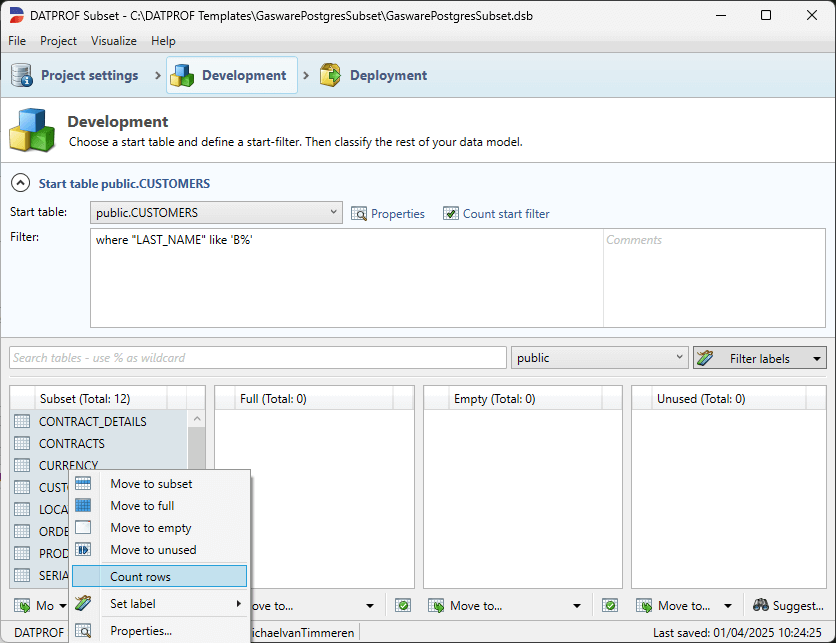
The row count reflects the total number of rows present in the Source database, providing a complete view of the table's size. This differs from the Start filter, which displays only the rows that meet the specific filter criteria.
Visualizing the data model
After completing the classification, you can visualize the resulting data model from the Metadata by navigating to Visualize → Data model in the menu bar.
In the visualization screen, you can choose which tables to display. By default, only unused tables are hidden from view.
The displayed data model includes all classified entities as well as any manually added relationships.
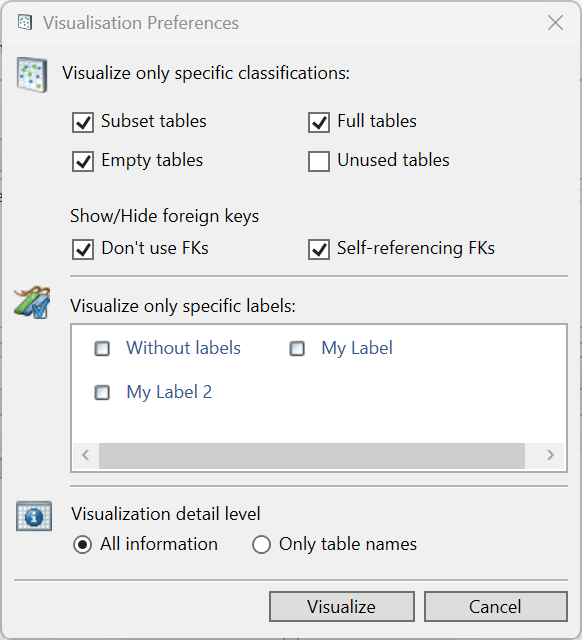
Press Visualize.

When visualizing the data model, the tables are displayed using a color-coded scheme for easy identification:
Green: Start table
Yellow: Subset
Blue: Full
White: Empty
Grey: Unused
The navigation screen is located in the upper-left corner of the data model view. Clicking on any part of the navigation screen will center that portion of the data model.
The toolbar includes a drop-down menu where a specific table can be selected. Choosing a table from this list will center it on the screen. The toolbar also provides options to:
Zoom in or out of the data model
Fit the entire data model to the screen
Save or print the current view of the data model

Additionally, by right-clicking on any table, a context menu will appear, offering extra actions that can be executed.
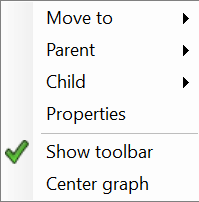
Move to : Option to change the classification.
Parent : This shows all parent tables. Selecting a parent table will result in the centering of this table.
Child : This shows all child tables. Selecting a child table will result in the centering of this table.
Properties : This will open the table details window.
Show toolbar: This shows or hides the toolbar.
Center graph: This centers the graph on the current point.
You can remove tables or relations from the data model view by pressing the “delete“ button on your keyboard. This action only removes the table or relation from the visual representation in the graph, and does not delete it from the Metadata.
Process model visualization
After classification and determining dependencies, the resulting process can be visualized by selecting the Visualize → Process model menu option.
The process model will display only the classifications that have been selected.

Press Visualize.
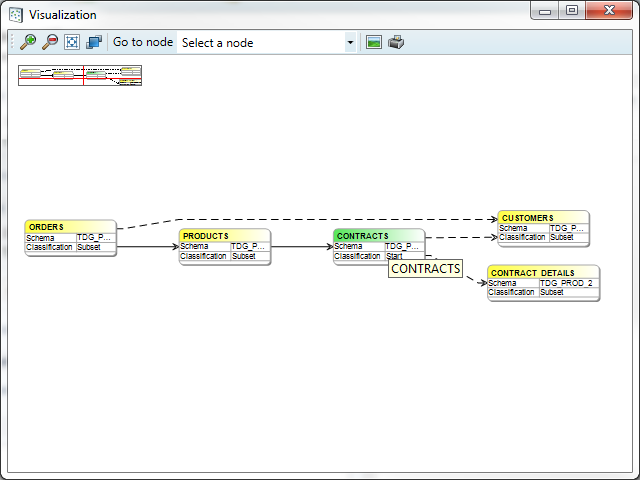
This screen is similar to the previously described data model. By selecting a table the colours change:
Green: Start table
Purple: A table that will be processed after the selected table.
Blue: A table that will be processed before the selected table.
Yellow: Other tables
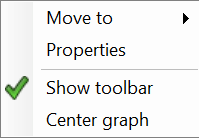
Right clicking a table opens the same menu as in the data model, the only missing options are Parent and Child.
Script Manager
To access the script manager, the user should navigate to Project → Additional scripts in the top-left corner of the Subset interface. In this section, users can define custom scripts to be used alongside the core Subset functionality. Both SQL and OS-call scripts are supported.
These scripts allow the user to execute a variety of database operations, depending on their database permissions. It's important to note that all SQL scripts are executed over a JDBC connection to the database, which may lead to slight differences in query results compared to testing in a DBMS. However, for most use cases, these differences are minimal and can be addressed with minor syntax adjustments.
In addition to ‘plain’ SQL, a user can also use PL/SQL (Oracle), Transact SQL (SQL Server) , SQL PL (DB2) or PL/pgSQL (PostgreSQL) to define scripts.
A script will only execute if it is enabled. The script content itself is stored in the scripts sub-folder within the project folder.
A SQL script is always executed as a single process and will never run in parallel with other functions. This approach is taken because it is difficult to predict which fields will be affected by the scripts. Running them in parallel could lead to situations where scripts inadvertently create deadlocks in the database. By executing scripts sequentially, the system ensures that potential conflicts are minimized, thus maintaining database integrity and preventing performance issues.
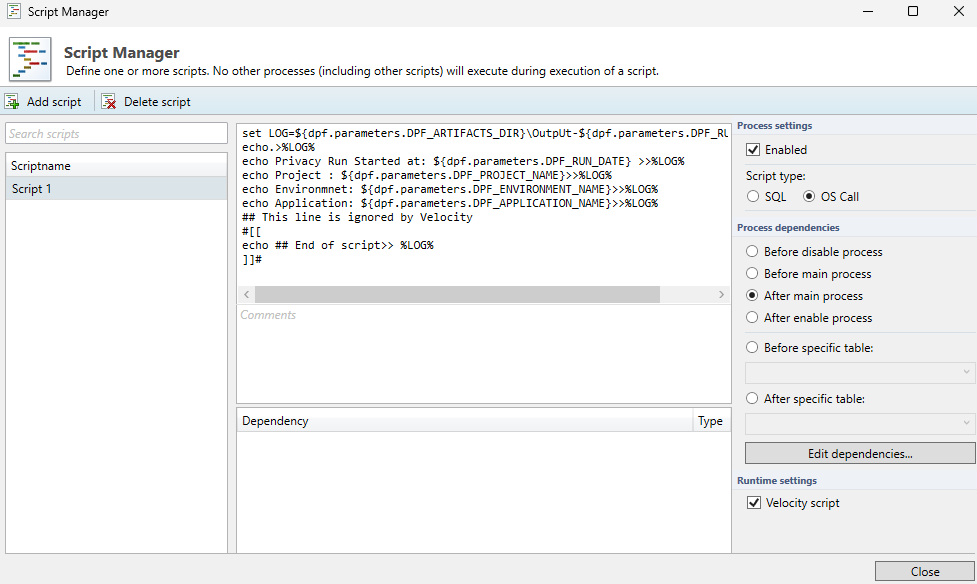
Script types
Scripts can be divided into two categories:
SQL scripts – scripts which are executed as SQL on the specified database connection.
OS call scripts – scripts which are executed on the command-line on the machine where Subset is running
SQL Scripts
SQL scripts follow the syntax for the specific database used in the Subset project. Some examples include the following:
PL/SQL (Oracle)
Transact SQL (Microsoft SQL Server)
SQL PL (DB2)
PL/pgSQL (PostgreSQL)
OS Call Scripts
Any configured OS call scripts must match the operating system they are intended to run on, whether it be Windows or Linux. These scripts are executed on the operating system where Subset is installed. However, if a Subset template is uploaded to Runtime, the script will be executed on the machine where Runtime is installed.
Process Dependencies
It’s possible to specify when a script should be executed by specifying dependency settings. This allows the user to control the execution flow of scripts in relation to specific process steps or table actions. Currently, a script can be set to execute in the following ways:
Before Disable process:
This setting allows a script to run before the Disable Process, where indexes, triggers, and constraints are temporarily deleted and the information for generating theRestoreDDL.sqlfile is retrieved.Before Main process:
This setting enables a script to execute before the Main Process, where data is subsetted from one database/schema to another. During this step, the database is in a state where there are no constraints on the data, allowing for modifications in the target database/schema.After Main process:
This setting allows a script to run after the Main Process, where the data has been subsetted into the target database/schema but still exists without constraints. As such, data can still be modified freely.After Enable process:
After the enable process, the run is effectively done. The data has been subsetted, and constraints have been reapplied.Before or after a specific table:
This dependency allows you to execute a script before or after a specific table has been subsetted.
The execution sequence between scripts can be set by choosing 'Edit dependencies'. This functionality allows users to define the order in which scripts are executed within the same process step. However, this dependency setting only works when scripts are executed during the same process phase.
For example, a script executed during the Before Main Process step cannot be dependent on a script executed during the After Main Process step, as these two processes are logically separated and executed at different times.
Batching of queries through the script manager
Because the script manager functions differently from a native query editor like Microsoft’s SQL Server Management Studio or DBeaver, it’s not always possible to copy over a query one-to-one. One limitation is that batching queries in the Script Manager cannot be done with the standard separator symbol ( ; ).
An example of an incorrect script can be found below.

In the above example, the script manager is unable to parse the semicolon (' ; ') as a separator, causing the query to fail. To execute multiple queries within a single transaction, ensuring that all queries are rolled back if one fails, the user can use a special separator command within the script body.
The special separator command is: !DPF_QUERY_SEPARATOR!.
If a complex script is being copied from a database management tool, the user should replace all traditional query separator symbols with this separator command. This ensures that the script manager can properly parse and execute multiple queries within the same transaction.
This works for all supported database types. A correct example of the above query can be found in the image below.

Velocity
For use in Runtime, you can enable Velocity syntax to allow the parsing of dynamic content within scripts. By default, this option is disabled. To enable it, simply select the checkbox labeled "Velocity script".
Velocity is a Template engine internally used by DATPROF Runtime to parse code, both SQL scripts and Os call scripts.
Velocity is an Apache project: http://velocity.apache.org/
Using the Velocity template engine allows users to reference and specify Velocity properties directly in their SQL code or OS scripts. This is done by using the following syntax: ${identifier.property}
For DATPROF Runtime all DATPROF Runtime velocity properties are available using the the dpf.parameters identifier.
Example: ${dpf.parameters.DPF_RUN_DATE}
Keep in mind that Velocity parses certain characters, such as # and ##. This may cause issues if your code contains these characters, as they might be interpreted by the Velocity engine and interfere with your script’s functionality.
To handle this situation, you have a few options:
Adjust the code: Modify your code to avoid using
#or##if possible.Mark the code as "Unparsed content": This will tell Velocity to ignore these specific parts of the script and not parse them.
Disable Velocity for this script: If the Velocity parsing is not required for your script, you can disable the template engine altogether for that particular script.
By using these methods, you can ensure that your scripts function as expected without interference from the Velocity engine.
For more information on the use of Velocity in Runtime check the "Velocity" chapter in the Runtime manual ( http://docs.datprof.com/runtime )
Example Script using Velocity including Comment line and Unparsed content.
set LOG=${dpf.parameters.DPF_ARTIFACTS_DIR}\OutpUt-${dpf.parameters.DPF_RUN_ID}.log
echo.>%LOG%
echo Subset Run Started at: ${dpf.parameters.DPF_RUN_DATE} >>%LOG%
echo Project : ${dpf.parameters.DPF_PROJECT_NAME}>>%LOG%
echo Environmnet: ${dpf.parameters.DPF_ENVIRONMENT_NAME}>>%LOG%
echo Application: ${dpf.parameters.DPF_APPLICATION_NAME}>>%LOG%
## This line is ignored by Velocity
#[[
echo ## End of script>> %LOG%
]]#
Scripts are saved in the ‘Scripts’ subfolder of the project.
DME files
The application allows the user to exchange data models using the Data Model Export (DME) functionality. This functionality saves the data model in a generic DATPROF file format. The resulting file can be used within the DATPROF product range.
Through the menu option Project → Export Metadata to DME file, the project data model can be exported to a DME file. In the dialog the user can specify the tables (per schema) to be exported. The corresponding foreign keys can be exported too.
Using DME Files has some limitations:
DME files do not support the use of multiple schemas
Foreign Keys with a condition are not exported
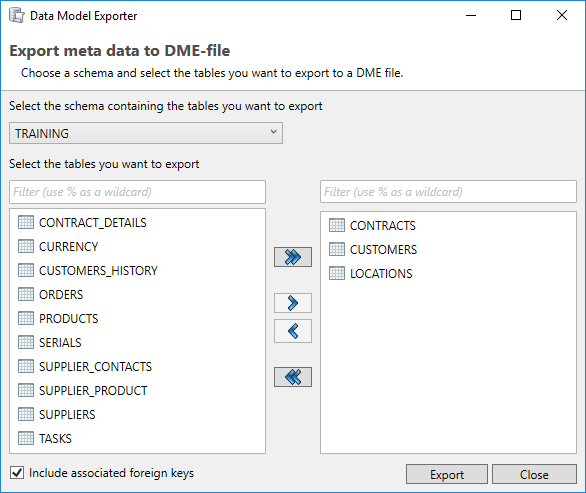
Using the menu option Project → Import and Synchronize metadata from DME file, the user can import a data model from a DME file into his project.
About the Execution of PowerShell scripts
When using DATPROF Subset, scripts are executed using the command: cmd /c myscript. As a result, the script cannot directly be a PowerShell script. Instead, you must create a separate script file to invoke PowerShell commands.
By default, PowerShell's execution policy is set to "Restricted", which prevents PowerShell scripts from running. To bypass this restriction and execute a PowerShell script, you can use the "Bypass" policy.
Example Command to Run a PowerShell Script:
Powershell.exe -ExecutionPolicy Bypass -File "C:/path/to/mypowershellscript.ps1"This approach ensures the PowerShell script runs successfully despite the default execution policy.
