Development
This chapter describes the Development module, this is where a user creates his own Subset.
Developing within DATPROF Subset is comprised on selecting the Start table, creating a Start filter, and classifying the rest of the Metadata.
It is required that the Source database Metadata has been imported.
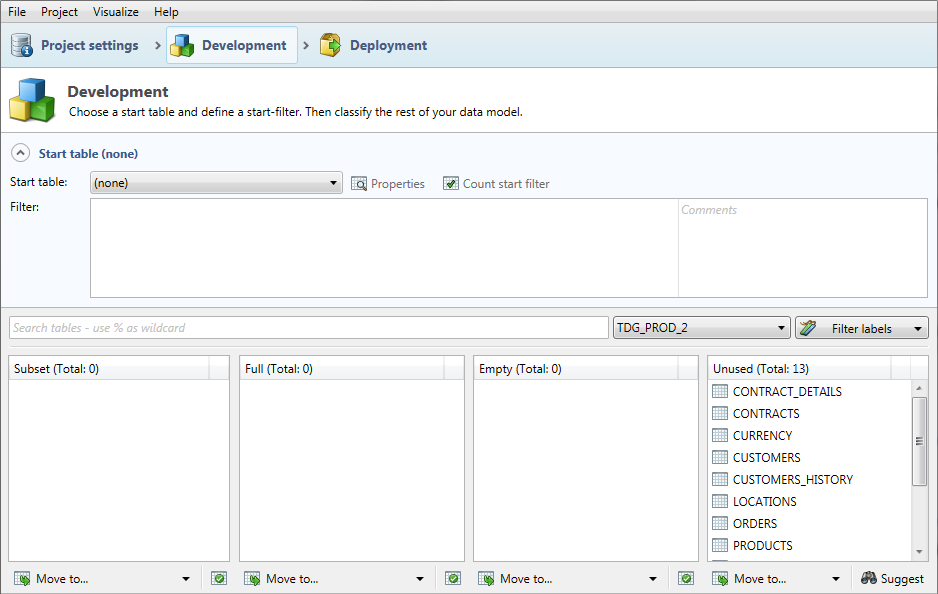
Start table
The Start table is a table that determines what data is selected from the rest of the database, based on Foreign Key relations. It is mandatory to select a Start table. Normally, the Start table is a central entity within the application, i.e. Customers.

The Start table can be selected in the middle part of the screen by selecting the table from the Start table drop-down box.
Define a Filter
To limit the size of a Subset the Start filter needs a filter. This filter is a ‘where clause’ of a SQL query. This query will be executed on the Start table. It is possible to use all standard SQL conditions that can be used on the particular database. The columns of the start table should be referenced without table name and schema name.
Example
where last_name like 'A%'
Changing the Start table the Filter will disappear, but the filter will be preserved. Reselecting the previous Start table will reload the original filter associated with this table. Choosing the Start table is one of the most important Subset choices to be made, because this determines what data will be selected from the database.
Because all queries for selecting data are executed on the Target database, all table names mentioned in the Filter will be looked for in this database. Therefore, the table name should be fully specified to guarantee the right result. The methods for this differs between Oracle, MS SQL and DB2.
Oracle
Within the same database the specific schema should be mentioned.
This looks like:
<schema>.<tablename>
Example
SOURCESCHEMA.CUSTOMERS
Using a remote database a database link should be used.
This looks like:
<schema name>.<table name>@<database link name>
Example
SOURCESCHEMA.CUSTOMERS@dblink
The Start table has it's name available as an ALIAS.
MS SQL
Within the same instance the database and user should be mentioned
This looks like:
[<database name>].[<schema name>].[<table name>]
Example
[SOURCEDB1].[dbo].[customers]
Using a remote instance, the OpenRowSet method should be used.
This looks like:
OPENROWSET(‘DRIVER’, ‘ConnectionString’, ‘Query’)
Example
OPENROWSET(‘SQLOLEDB’, ‘Server=ATLAS,1433;Uid=srcuser;Pwd=srcuserpwd;’, ‘select * from [SOURCEDB1].[dbo].[CUSTOMERS] where Sal > 5000’)
Microsoft offers comprehensive information about the usage of OpenRowSet.
DB2
The following syntax can be used when working within the same database:
<schema name>.<table name>
Example
GASWARE.CUSTOMERS
Using another database, a nickname of the remote table should be used. DATPROF Subset generates this nickname by prefixing the table name with DSB_.
The syntax will look like:
<schema name>.DSB_<table name>
Example
GASWARE.DSB_CUSTOMERS
Start table properties
The Start table has a number of changeable properties, they will affect saving and/or creating the table on the Target database. Click Properties to open this menu comprised of four tabs.
Tab: Columns
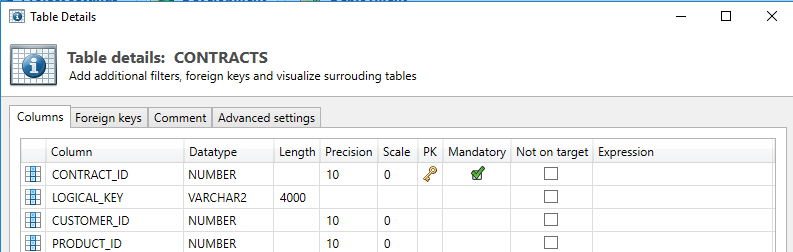
This tab shows the columns / fields of the selected table. These can be altered on:
- Primary key: by right clicking on a specific field the PK setting can be toggled. Often this remains unaltered, but in some cases tables don’t have a PK in the Source, but it is desirable to add this in the Target database.
- Not on Target: This setting indicates whether a column is present in the Target database. This could mean that the table has / gets another structure than in the Source database.
Running in (Re-)fill mode will nullify this field.
Running in (Re-)Create mode implies this column will not be created in the Target database. - Expression: This can be used to insert an expression to add to the field in the Target database. This option can handle all available SQL expressions the database allows.
Example:
‘xxx’ : fills this column on every row with "xxx"
upper(first_name) : Changes all values in the column first_name to uppercase.
A column can be removed from the Metadata by selecting the column and hitting Delete on the keyboard. At first glance this is the same as selecting the checkbox ‘not on target’. The difference is that by deleting this the Metadata will be out of sync with the Source database, and after synchronizing Metadata this column will reappear.
Tab: Foreign Keys
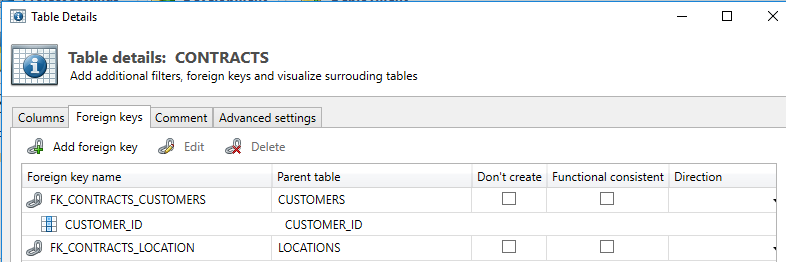
This tab shows all Foreign Keys belonging to this table as present in the Metadata. During classification the Foreign Keys between the tables are required for the classification “Subset”.
It is possible to add, change or delete a Foreign Key:
- Add Foreign Key: When a table in the database has a relation with another table, but there is no Foreign Key defined in the database, then this can be added. This occurs when table relations are defined in the application layer as opposed to the database.
- Edit: This is a variation on adding a Foreign Key, only now the already existing data can be edited.
Adding a Foreign Key is required if the database does not provide forForeign Keys. Without Foreign keys Subset does not know how to select data from tables and will always classify tables as Full.
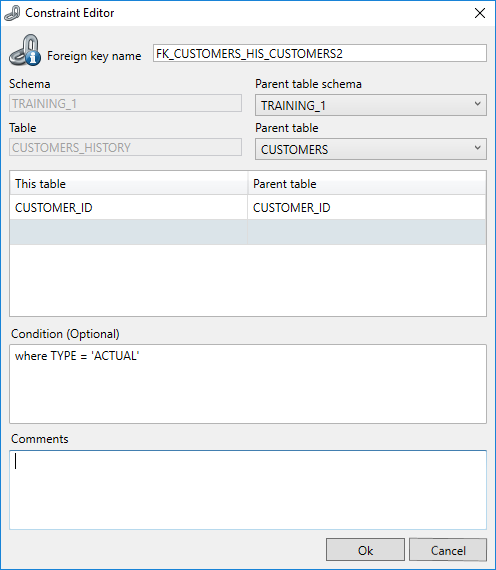
By adding or editing a Foreign Key The Constraint Editor will open.
You create the Foreign key on the Child table. You must select the table holding the parent key.
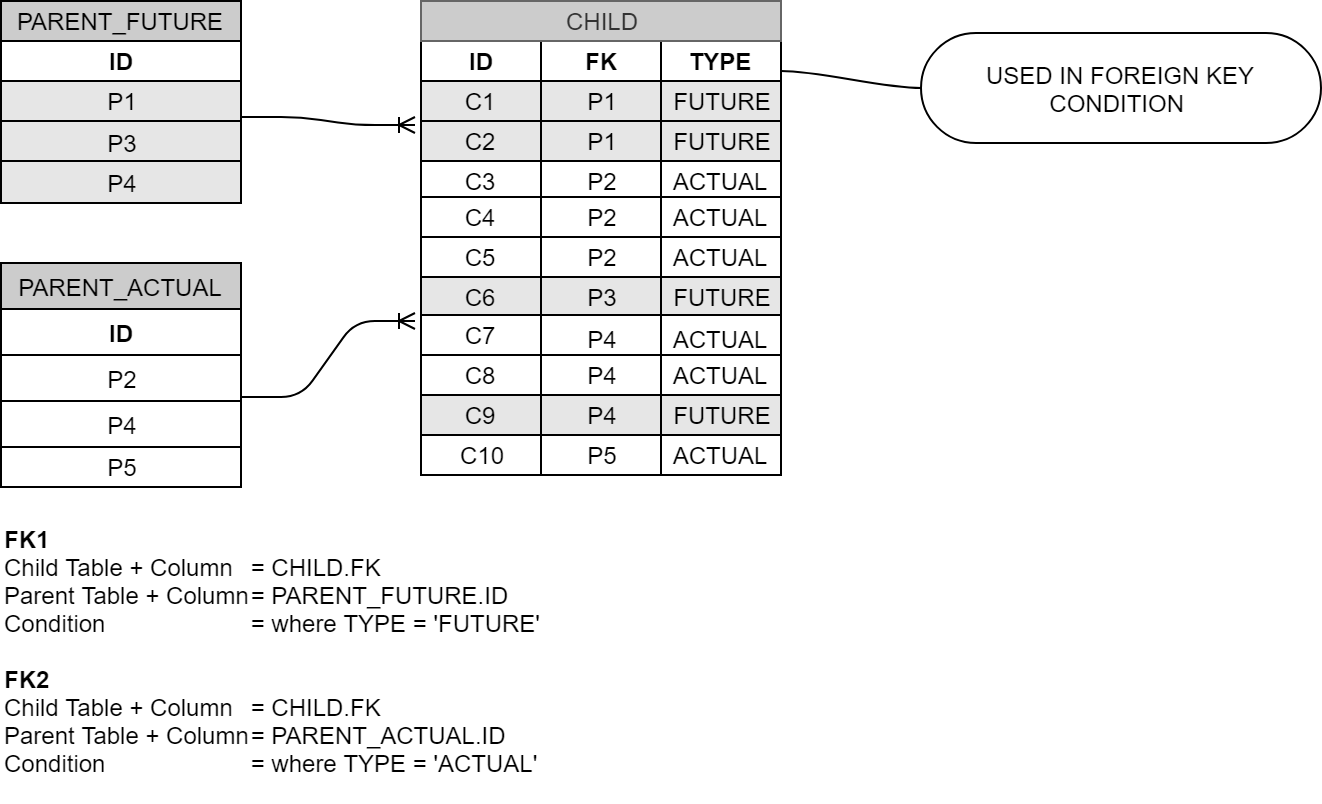
Condition
In Subset you can add a condition to a Foreign Key. Beware that this is not valid DDL, so this foreign may/can never exist in the database. (See notes below on the "Don't Create" option)
The condition is useful when the child table has relations with multiple parents where the Foreign Key columns are the same but an additional field in the child table distinguishes the values belonging to either of the parent tables. The condition is meant for queries on the Child table.
- Delete: When not all tables and / or Foreign Keys have to be present in the Target database, they can be deleted. This only applies to the (Re-)Create Deployment Strategy.
For every Foreign Key three options are available.
- Don't create: If the (Re-)Create Deployment Strategy is chosen, this setting prevents the creation of the Foreign Key on the Target database. This often applies to manually added Foreign Keys that only are needed within DATPROF Subset. Foreign Keys that are already present in the Target environment will not be deleted from this database when any Deployment Strategy is picked, except for (Re-)Create.
") When adding a condition to a Foreign Key this option is always checked. Setting a condition is not a valid DDL statement. It is DATPROF functionality only.
When adding a condition to a Foreign Key this option is always checked. Setting a condition is not a valid DDL statement. It is DATPROF functionality only. - Functional consistent: This option forces DATPROF Subset to select all Child-records belonging to the present Parent-records based on this Foreign Key. This can be an addition to the contents of the Child table compared to the designated start filter.
Functional iteration can trigger additional technical iterations, to enforce referential integrity. - Direction: This option enables the user to enforce the direction in which certain tables are subsetted.
Three options which are used as hints for the Process algoritm.- Parent → Child: First select the Parent table of the FK and use that to select the data in the Child table. This will make the relation functional consitent. Use this if the process model shows the Child before the Parent but you want all child records of the the parent.
- Child → Parent: First select the Child table of the FK and use that to select the data in the Parent table.
- Do not use FK. When having multiple FKs with one parent only one is used for iteration. That might be the one you do not require, Tune this by deselecting the FK.
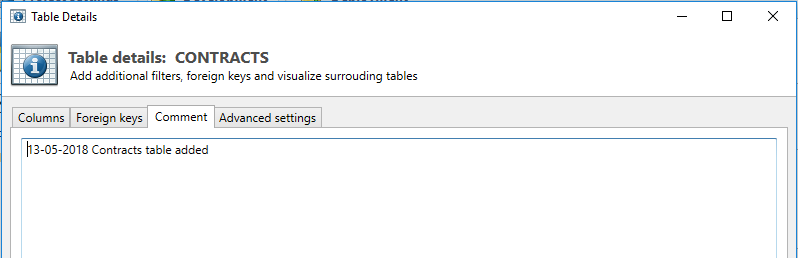
Tab: Comment
Example
GASWARE.DSB_DWH_PRODUCTS_HIS
This tab gives users the option to add comments to a table. The comments added here will show up in the Comments report.
Tab: Advanced Settings (Oracle)
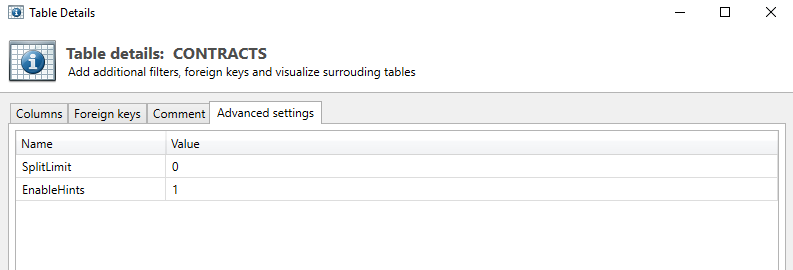
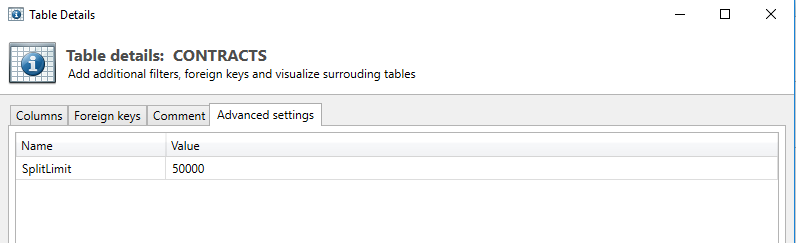
SplitLimit
Specifying the Split Limit breaks up long running database transactions into blocks of the specified rows thus preventing database problems in the temporary tablespace.
The default value is 0 meaning no splitlimit. Adjust only when having problems.
EnableHints
DATPROF Subset uses some hints to perform efficient Bulk transactions. Sometimes you might want to disable thes. Uncheck this box.
The default value is checked on.
The folowing advanced settings only have effect when running subset in non-legacy mode.
AppendQueryHints → AppendQuery.template
AppendUniqueQueryHints → AppendUniqueQuery.template
AppendUniqueTechQueryHints → AppendUniqueTechQuery.template
FunctionalAppendQueryHint → AppendQuery.template
TechnicalAppendQueryHints
Tab: Advanced Settings (DB2 for LUW)
SplitLimit
Specifying the Split Limit breaks up long running database transactions into blocks of the specified rows thus preventing database problems. More specific, with the temporary tablespace.
For LUW this is done for the temporary tables and the insert into the target table.
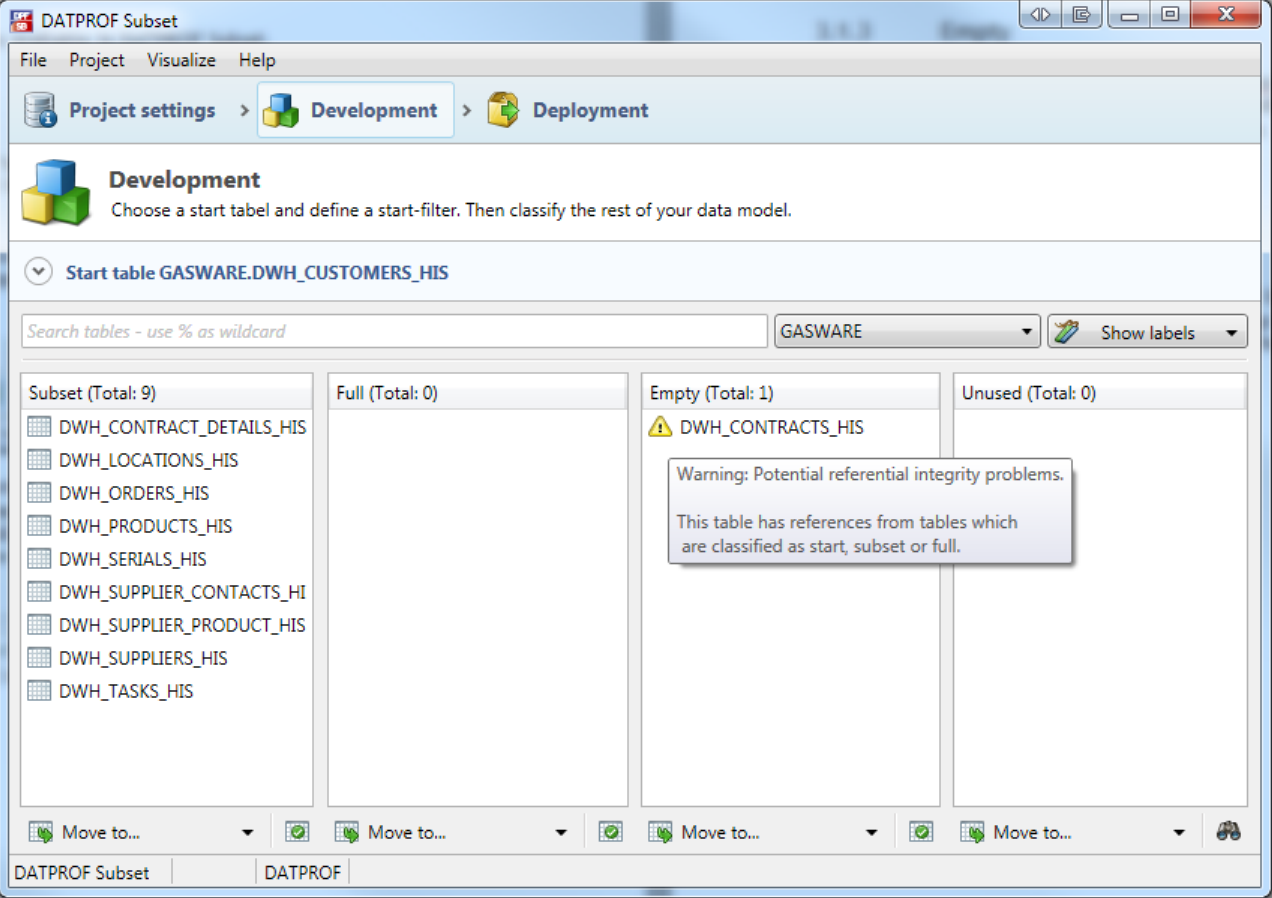
Classification
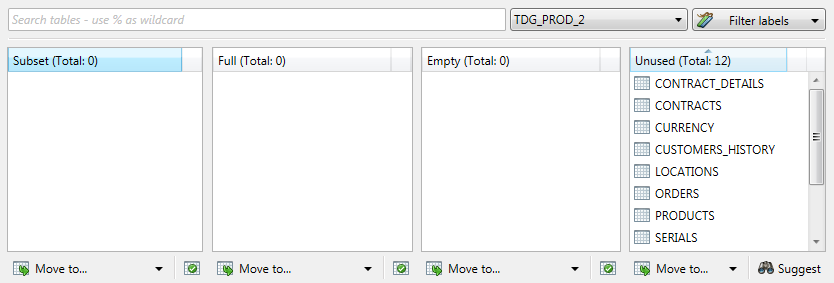
The “classification” of tables in part determines the contents of the Subset. Classification means that per table is determined whether the data of a table will be read and in what way this is done.
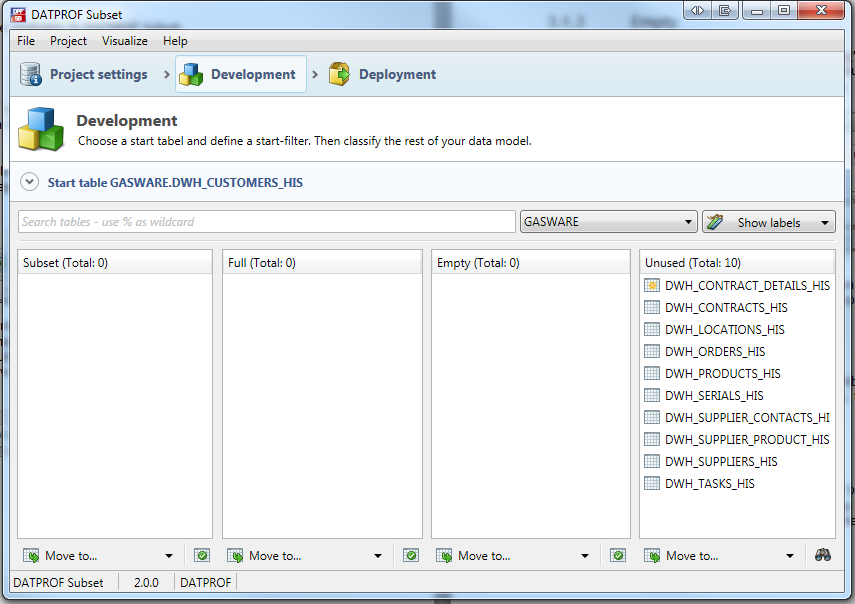
Making a classification takes place in the lower part of the screen, and is done per imported schema. The schema is selected using a drop-down box.
There are four possible classifications: Subset, Full, Empty or Unused.
Every table has only on classification. Newly imported tables are by default classified as Unused.
The classification of tables can be changed in several different ways.
- By dragging the selected tables to the desired classification.
- By right clicking the selected table and selecting ‘move to’ to move the table to the desired classification.
- The selected table(s) with the button ‘Move to’ to move the table to the desired classification.
- By using the Suggest function
- Through the detail screens of a table
- From the data model and process model visualizations.
The result of the classification can be refined even more through changing the table properties.
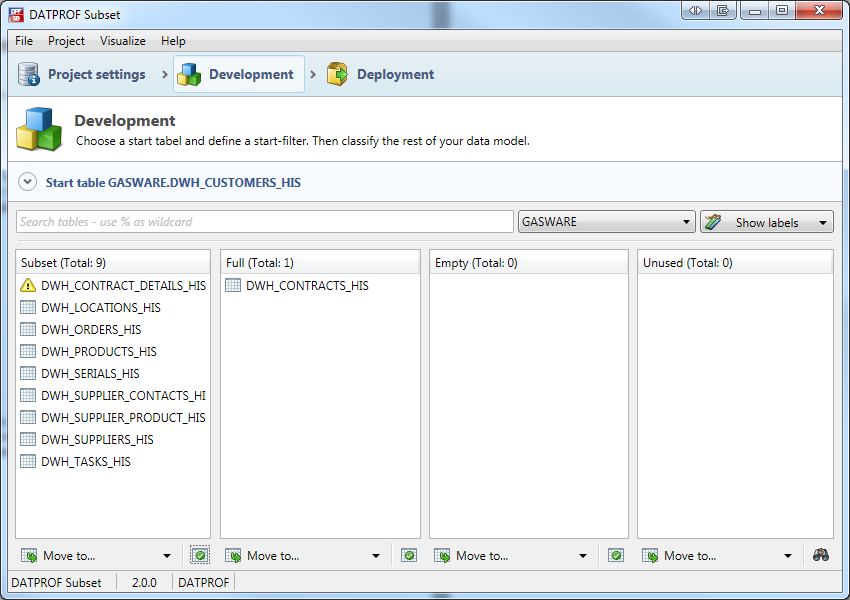
Classification: Subset
Tables classified as “Subset” will be filtered based upon the results of the filtered Start table.
For an actual Subset it is imperative that the Foreign Keys are present to derive the data for directly or indirectly connected tables. If not present these Foreign Keys need to be manually added.
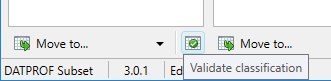
By clicking the “Validation” button the current classification can be validated.
An unrelatable Subset table will give a non-blocking warning. To prevent this warning the classification has to be altered or an additional relation has to be added by hand.
Unrelatable tables will not be filtered and thus will be added completely.
Classification: Full
Tables classified as “Full” will be copied completely. Often, tables classified as Full are tables containing master data, application data or control data.
By clicking the “Validate” button the current classification can be validated.
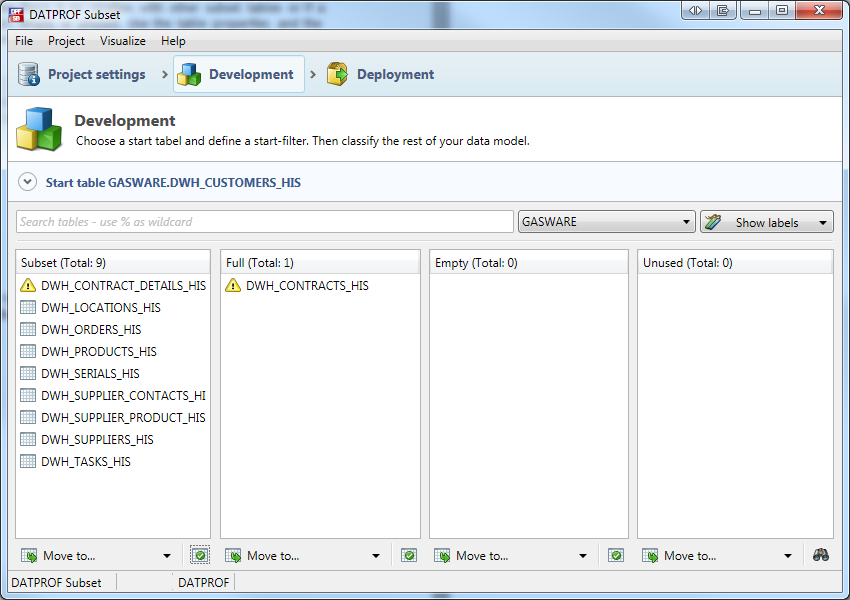
A table with Full classification referencing the Start table or a table having the classification Subset, Empty or Unused will give a non-blocking warning. To prevent this warning, the classification has to be changed or the relation must be removed.
Classification: Empty
Tables classified as “Empty” will be truncated on the Target database. Normally this classification is used for tables where the data from the Source database is not needed on the Target database, but the physical table has to be present. This often applies to logging tables.
By clicking the “Validate” button the current classification can be validated
A table classified as Empty referencing a table classified as Start, Full or Subset will give a non-blocking warning. To prevent this warning the classification has to be changed or a the relation has to be deleted.
Classification: Unused
Tables classified as “Unused” will be ignored during the subsetting process. This classification can be seen as a work list for the configuration of DATPROF Subset.
Tables in the Target database that shouldn’t be altered, e.g. configuration tables, will often be classified as Unused.
It is not possible to validate Unused tables.
After importing or synchronizing Metadata newly added tables will be marked with a yellow star. This marking will be removed after saving and reopening the project.
Suggest
The “Suggest” function can support users in classifying the imported Metadata. DATPROF Subset is able to analyse the Unused tables based upon the relations, and give a classification suggestion whether a table should be classified as “Full” or “Subset”. The Empty classification will not be suggested.
The binocular icon on the bottom right of the screen will open the Suggest classification options
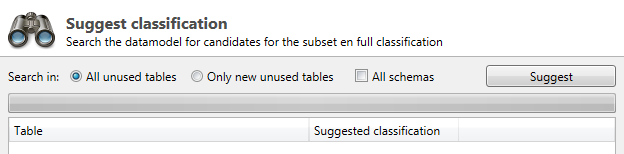
The opened screen gives the option to select all Unused tables or only the newly added tables. By selecting All schemas the suggestion will include the unclassified tables of all schemas in the project. By default only the active schema will be used. By clicking “Suggest” the data model will be analysed and a classification will be suggested.
The following rules apply to Suggesting a classification:
- A table (in)directly related to the Start table will be classified as Subset.
- A table without any relation will be classified as Full.
- A table that only serves as a reference for other tables will be classified as Full.
After this a list with suggestions will be shown, in this list a user can change the given suggestion by selecting another classification from the drop-downbox.

Confirm the selected suggestion by clicking “Apply”.
Table Details
After classifying the tables the result of the Subset can be further refined by changing the Table properties. These properties will become visible by clicking the table with the right mouse button and selecting Properties.
This opens a screen with multiple tabs. From this screen it is also possible to change the current classification.
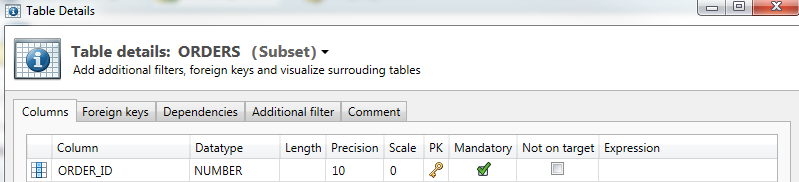
Tab: Columns
This tab contains the same functionality as explained before in the Start Table chapter of this page.
Tab: Foreign Keys
This tab contains the same functionality as explained before in the Start Table chapter of this page.
Tab: Dependencies
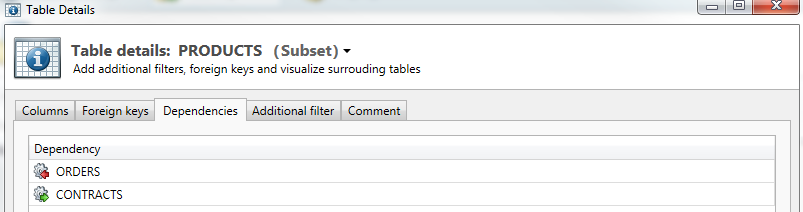
This tab shows where dependencies have been made and which table will precede / succeed the current table. The complete overview is called is Process model, this can be visualized via the Menu option “Visualize”.
By clicking “Edit” the Dependencies Editor shall open.
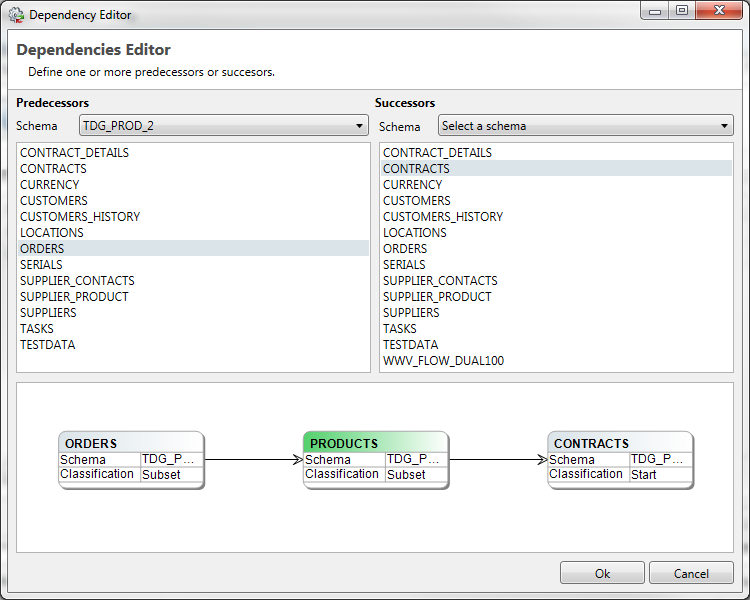
From this screen a schema can be selected, and per schema its tables:
- Tables selected from the left column will precede the current, green, table.
- Tables selected from the right column will succeed the current, green, table.
The lower part of the screen visualizes the current selection.
![]() It is important to realize that whenever a FK exist between two tables and you also specify a dependency, the FK relation is ignored. In effect the child table is fully selected. An additional filter might help you here.
It is important to realize that whenever a FK exist between two tables and you also specify a dependency, the FK relation is ignored. In effect the child table is fully selected. An additional filter might help you here.
Tab: additional filter
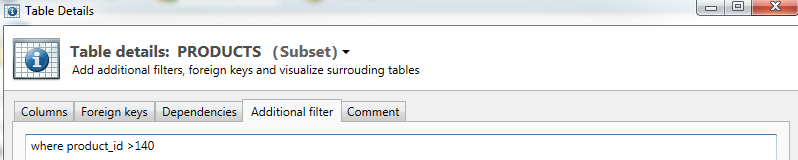
From the screen the result can be further refined by adding a filter. This works in similar fashion as the Start filter; like a ‘where clause’ from a SQL query. This where clause can include all standard SQL conditions for the used database.
Tab: Comment
This tab contains the same functionality as explained before in the Start Table chapter of this page.