Development Tools
There are a couple of classification tools available that are particularly useful with complex datamodels.
Filtering
The number of tables shown can be easily reduced by applying a search filter.

This search filter can be added just above the Classification panel. The ‘%’ can be used as wildcard value. This filter does not influence the subsetting process.
Labels
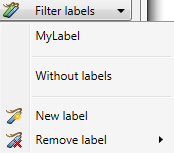
By adding labels to tables it is easy to create a functional selection of tables. Labels can be managed from the Label menu, which is located on the right of the search panel.
- Select one or more labels to filter tables assigned to this label.
- Select tables not assigned to labels.
- Create a new label.
- Remove existing labels.
Labels can be assigend to tables by clicking the right mouse button and selecting one or more labels. This can also be done by selecting multiple tables and assigning labels to them.
This filter does not influence the subsetting process.
Labels cannot be renamed.
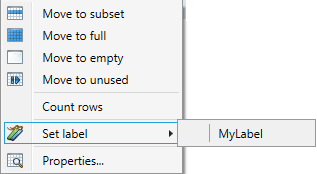
Count Rows
The number of rows in tables in the Source database can be counted. This number can be of help at the classification of tables, e.g. what Start table to use. The rows can be counted by right clicking the table(s) and selecting Count rows from the menu. The results are saved to the project file.
This count shows the number of rows present in the Source database, as opposed to the Start filter, which shows only the result of the filter.
Visualizing the data model
After classification the resulting data model in the Metadata can be visualized by selecting Visualize - > Data model from the menu bar.
In the resulting screen choices can be made what tables to show. By default only Unused tables are hidden.
The data model contains all classified entities, including all manually added relations.
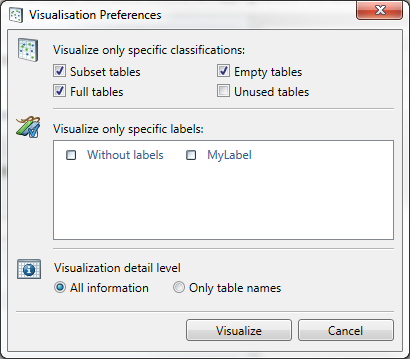
Press Visualize.
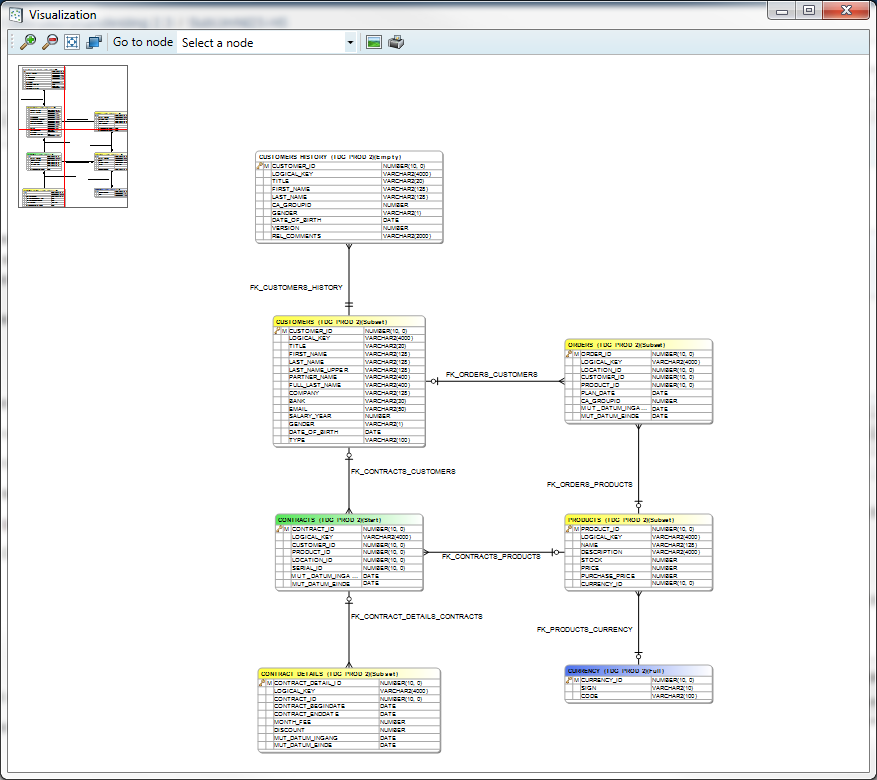
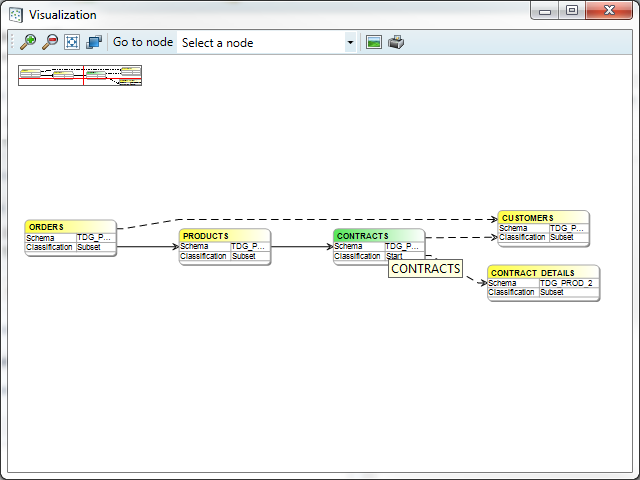
The tables are shown using the following colour scheme:
- Green: Start table
- Yellow: Subset
- Blue: Full
- White: Empty
- Grey: Unused
The navigation screen is shown in the left upper corner of the screen. By clicking in it that part of the data model will be centred.
The toolbar has a drop down box where a particular table can be selected, doing this will centre this table. The toolbar also contains buttons to zoom, fit the data model to the screen and save or print the data model.
By right clicking on a table, a menu will appear from which you can execute additional actions:
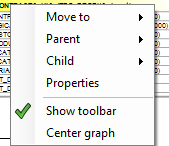
- Move to : this changes the classification.
- Parent : This shows all parent table. Selecting a parent table will result in the centration of this table.
- Child : This shows all child table. Selecting a child table will result in the centration of this table.
- Properties : This gives the option to change the table properties.
- Show toolbar: This shows or hides the toolbar.
- Center graph: This centres the graph on the current point.
It is possible to remove tables or relations from this scheme by pressing the delete button on your keyboard. This only deletes the table or relation from the graph not from the Metadata.
Process model visualization
After classification and determining dependencies, the resulting process can be visualized by selecting the menu option Visualize - > Proces model.
The process model will only show the selected classifications.

Press Visualize.
This screen is similar to the previously described data model. By selecting a table the colours change:
- Green: Starttable
- Purple: A table that will be processed after the selected table.
- Blue: A table that will be processed before the selected table.
- Yellow: Other tables
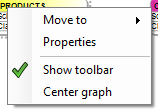
Right clicking a table opens the same menu as in the data model, the only missing options are Parent and Child.
Script Manager
Besides the selection of the Start table and classification of the other tables, the Subset run can be influenced by (additional) scripts.
These scripts can be executed on fixed moments, you can set the sequence between scripts.
They can be developed from the Script Manager. To get there open from the menu Project - > Additional scripts.
There are two variations of scripts
- SQL scripts
- OS call scripts.
The purpose of the scripts varies. A script can be used for adding or removing specific data, creation of tables/indexes or emptying logfiles.
Sql Scripts follow the syntax for the specific database: PL/SQL (Oracle), Transact SQL (Microsoft SQL Server), SQL PL (DB2) or PL/pgSQL (PostgreSQL) can be used.
The OS call scripts have to match the operating system they are used on (Windows of Linux).
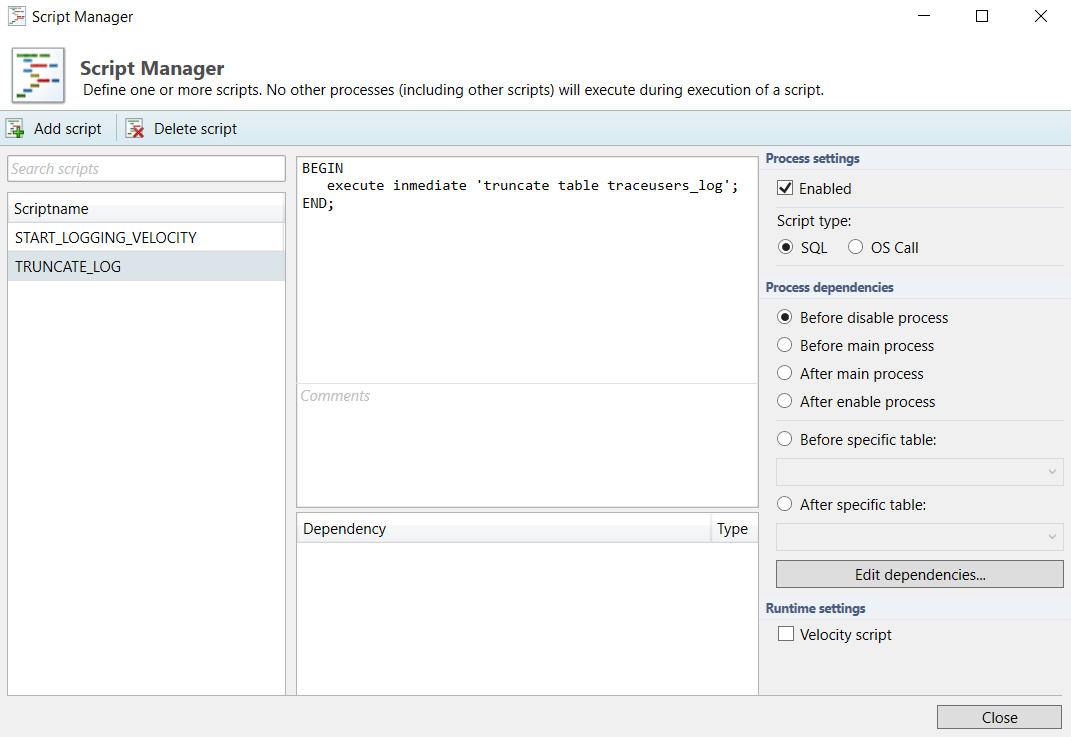
It is possible to indicate where a script must be executed. The checkbox Enabled indicates whether a script must be executed or not.
You can select the moment to execute the script:
- Before Disable process
The Disable Process is the process of disabling and deleting the Indexes, triggers and constraints including the retrieval of this information and the generation of the RestoreDDL.sql. - Before Main process
The Main process is the process of subsetting the data. - After Main process
- After Enable process
- Before or after a specific table
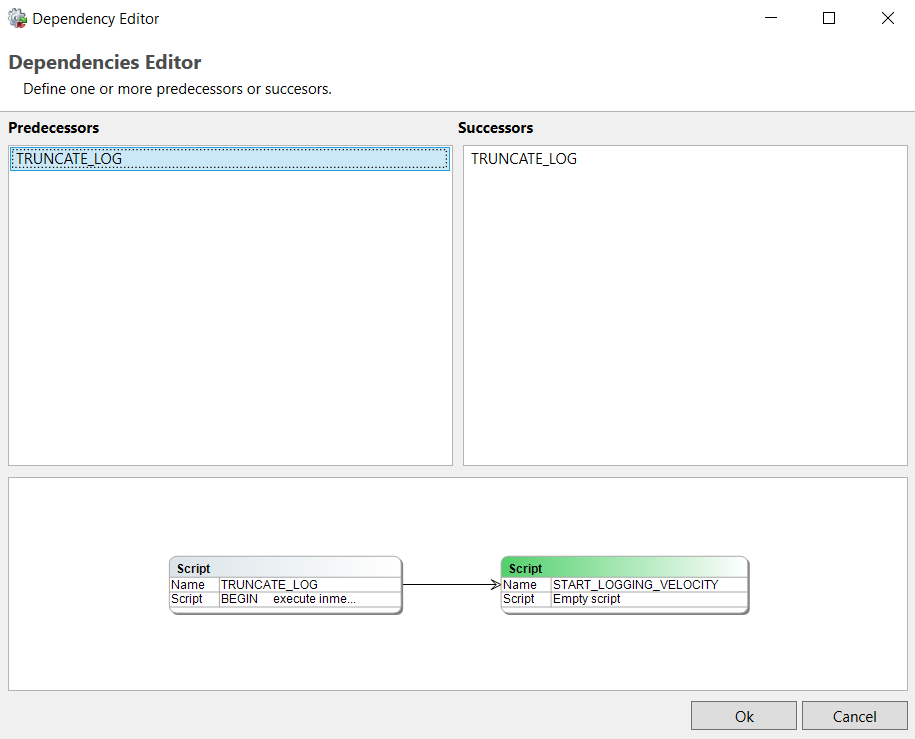
The sequence between scripts can be set by choosing 'Edit dependencies'. This functionality only works when scripts are executed in the same process part.
Velocity
For use in Runtime you may choose to allow for Velocity syntax. By default this is disabled, To enable it select the checkbox "Velocity script".
Velocity is a Template engine internally used by DATPROF Runtime to parse code, both Sql scripts and Os call scripts.
Velocity is an Apache project: http://velocity.apache.org/
Using this template engine allows users to reference and/or specify Velocity properties in your own SQL code or OS Scripts.
You can refer to properties by using this syntaxt ${identifier.property}
For DATPROF Runtime all DATPROF Runtime velocity properties are available using the the dpf.parameters identifier.
Example: ${dpf.parameters.DPF_RUN_DATE}
![]()
For more information on the use of Velocity in Runtime check the "Velocity" chapter in the Runtime manual ( http://docs.datprof.com/runtime )
Example Script using Velocity including Comment line and Unparsed content.
set LOG=${dpf.parameters.DPF_ARTIFACTS_DIR}\OutpUt-${dpf.parameters.DPF_RUN_ID}.log
echo.>%LOG%
echo Subset Run Started at: ${dpf.parameters.DPF_RUN_DATE} >>%LOG%
echo Project : ${dpf.parameters.DPF_PROJECT_NAME}>>%LOG%
echo Environmnet: ${dpf.parameters.DPF_ENVIRONMENT_NAME}>>%LOG%
echo Application: ${dpf.parameters.DPF_APPLICATION_NAME}>>%LOG%
## This line is ignored by Velocity
#[[
echo ## End of script>> %LOG%
]]#
Scripts are saved in the ‘Scripts’ subfolder of the project.
DME files
The application allows the user to exchange data models using the Data Model Export (DME) functionality. This functionality saves the data model in a generic DATPROF file format. The resulting file can be used within the DATPROF product range.
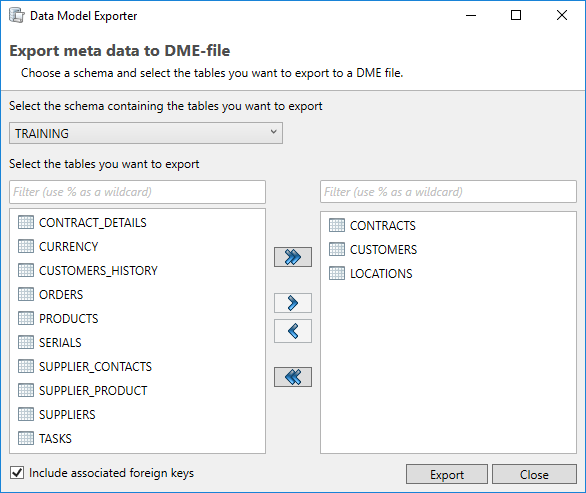
Through the menu option
Project → Export Metadata to DME file, the project data model can be exported to a DME file. In the dialog the user can specify the tables (per schema) to be exported. The corresponding foreign keys can be exported too.
Using DME Files have some limitations:
- DME files do not support the use of multiple schemas
- Foreign Keys with a condition are not exported
Using the menu option Project → Import and Synchronize metadata from DME file, the user can import a data model from a DME file into his project.
About the Execution of PowerShell scripts
The script that is made in DATPROF Privacy is performed with “cmd /c myscript” and therefore it cannot be a PowerShell script. This requires the creation of a separate script file.
The execution policy of PowerShell is by default on “Restricted” and this enables PowerShell scripts from running. By using a “bypass” policy the script can be executed. In this script a PowerShell script can be called in the following way:
Powershell.exe -executionpolicy bypass -File "C:/path/to/mypowershellscript.ps1"