Installation instructions
Preparation
Before installing check the following items:
You must be logged in on the server as the user that will normally start Runtime.
You need a writable folder to extract the Runtime zip file into.
This will be the Runtime Installation Folder
You need an existing empty folder to store all the Runtime data.
From this point onward, we'll be referring to this folder as the Runtime Data folder. This folder will get populated with all the information used by the customer (log files, projects, and other information), and can be maintained between versions of Runtime when updated.
Installation Path Examples
Windows
Folder | Example Location |
|---|---|
Runtime Installation Folder | c:\Apps\Datprof\Runtime |
Runtime Data folder | c:\Data\RuntimeData |
Linux
Folder | Example Location |
|---|---|
Runtime Installation Folder | /usr/app/datprof/runtime |
Runtime Data Folder | /home/datprof/runtimeData |
Extract the software
Extract the Runtime software in the Runtime Installation Folder.
This will create a sub-folder named runtime-<version>.
Example: c:\Apps\Datprof\runtime-4.6.0
Network setting configuration
In case the user needs to use a non-standard network configuration, this can be achieved by editing the runtime.properties file in the conf sub-folder of the runtime data folder. This folder is automatically created upon first time execution.
Runtime Properties file
Start DATPROF Runtime
Now execute the Runtime startup script using the Datprof Runtime Data Folder as a required parameter
Windows: <Runtime Installation Folder>\runtimeStart.bat <Runtime Data Folder>
Linux: <Runtime Installation Folder>/runtimeStart <Runtime Data Folder>
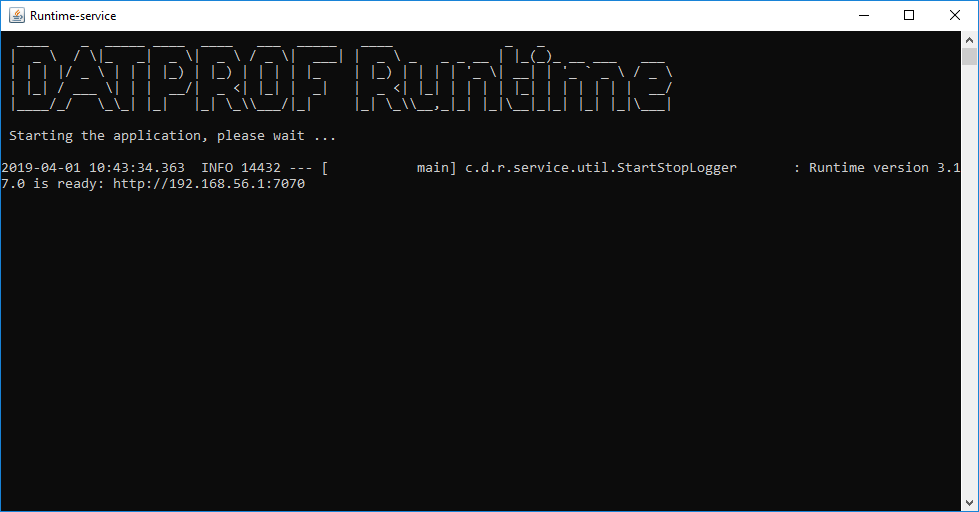
Datprof Runtime opens a window and once started the following message appears: "Runtime version <x.y.z> is ready: <IP-Address>:<PortNumber>"

First time login
To connect with Runtime, a browser is needed. After starting the browser, the user can input the IP-address and port number under which Runtime is hosted. When executing on the machine where runtime is installed localhost:7070 is sufficient to connect with the default configuration file.
Once you’ve connected to the web interface, you’ll be greeted by a log-in page where you can log in using the default credentials.
Username: admin
Password: admin
Change the admin password as soon as possible!
This can be done by clicking the Administration icon in the left-hand menu bar and selecting "Change Password" from the "Edit" drop-down menu.
The first time you login you will get a prompt telling you that the license has expired.
To resolve this, enter the correct License key under Administration → License.
