Creating a Virtualized Environment
The process of creating an environment within your container host is largely identical to the regular process of creating an environment, however, because we are using docker to create a container, we need to supply some additional information.
To get started with creating a virtualized environment; select or create a Group in the main menu of Runtime, and press Add Environment in the top-right group overview screen.
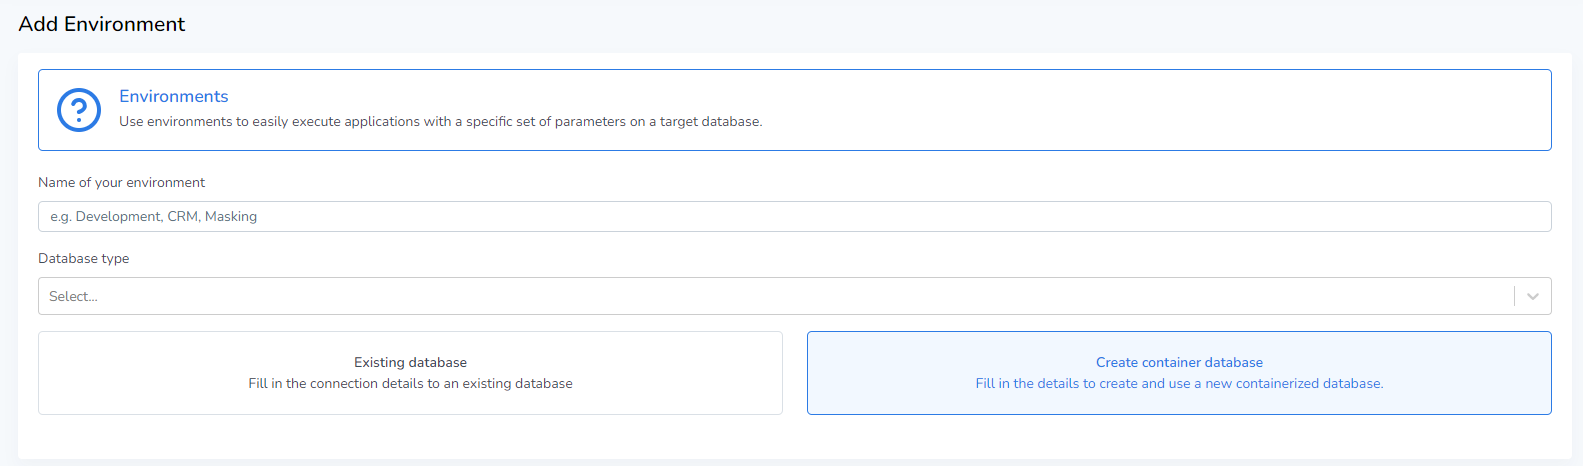
Environment name
Enter the name of the environment you’re creating. This name will be displayed within the group overview screen and is used to identify the environment.
Database type
The type of SQL database that’s being added. This is a drop-down menu that currently contains the following options:
IBM DB2 for iSeries
IBM DB2 for LUW (Linux, Unix & Windows)
IBM DB2 for z/OS (Mainframe)
MySQL/MariaDB
SQL Server (Which also serves as the Azure SQL connection type)
Oracle
PostgreSQL
Other.. (default connector)
The environments indicated in this list are shared between virtualized and “regular” database connections, and as such may depict database types which are not supported for Virtualize.
For regular database connections, selecting a database type informs which connectivity information we request from the user. For Virtualize however, all connection types use a standardized connection editor, and this option merely functions a flag.
For more information, refer to the Supported Databases segment of this documentation.
Environment type
In order to create a virtualize environment, the Create container database option must be selected. For the default environment type (indicated by Existing database option); please refer to the Environments chapter of the documentation.
Database settings
Container host
This is a drop-down menu that lists all configured container hosts from the Virtualize page. The selected container host’s connection data is used for any further operations within this environment.
Docker image
This is a free text field where the user can specify the name of any Docker image to be used. The name of this image must be a direct match, and any image used must be available within the Docker environment on the virtual machine beforehand.
Volume mapping
The volume mapping dictates where all data used is stored, in case the container is brought offline. The Host volume name refers to a location on the Virtual Machine where a volume can be created, and the Container volume refers to the location inside the container where any database information is stored. Generally, the latter uses a standard location, defined within a given database image.
Port Mapping
In order to connect to the container, we need to map which ports connect to each other. For this, there’s two ports we need, the Host Port and the Container Port. The container port is the port over which the database communicates, and this is usually static. For databases like SQL Server this is generally port 1433, and for PostgreSQL this is generally 5432. Of course, it is possible to configure this on the database.
The host port must be a unique port on the VM which is not already used by another Runtime environment. This can generally be any free port.
Environment
Here, the user can (and in some cases must) pass environment variables to the container. For certain images/databases, an environment variable is needed to successfully create a database.
Because sometimes passwords need to be supplied as an environment variable, every key has a Password checkbox next to it. Ticking this ensures that the configured value is not legible from the UI after configuration.
An example of a database image which cannot start without an environment variable is the PostgreSQL image. if the user does not supply a POSTGRES_PASSWORD and POSTGRES_USER key, deployment will fail.
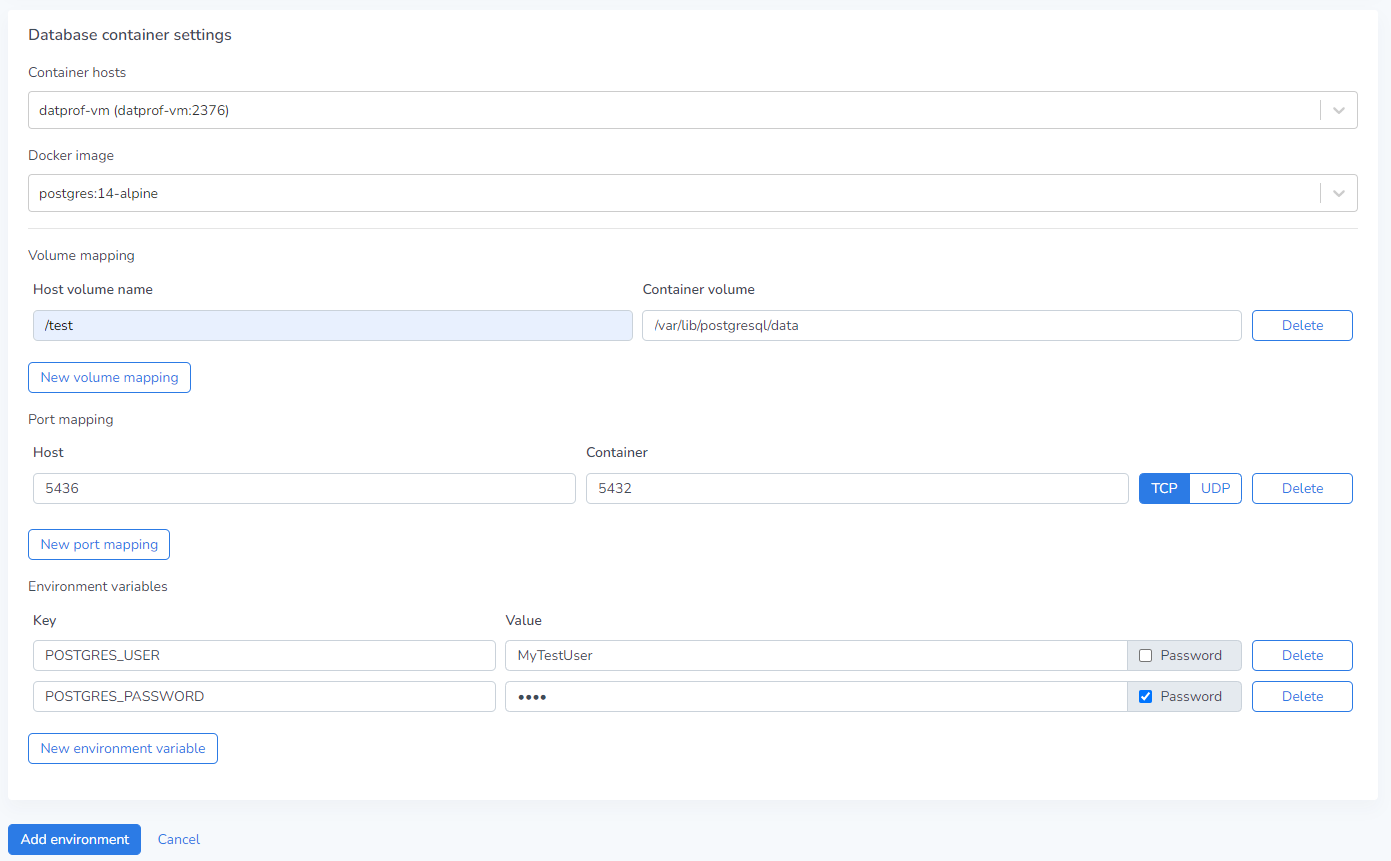
The above example includes all of the necessary fields to create a PostgreSQL container database on a given VM!
After all the above steps have been completed, the user can press Add environment to save the current configuration.